June 2024
Secure Project Dependencies with AWS CodeArtifact
In this project, I learned how to:
- 💡 Created a new CodeArtifact domain and repository to manage my Java project's dependencies.
- 💡 Configured my Cloud9 IDE to connect with CodeArtifact.
- 💡 Compiled and tested the project using the CodeArtifact repository, verifying that all dependencies were correctly fetched.
- 💡 Implemented IAM policies so that other AWS services in the CI/CD pipeline can access the CodeArtifact repository.
✅ Steps completed from previous project sections:
Step 1: Setting up a web app and IDE in the Cloud
Step 2: Create a Repository in AWS CodeCommit
⏭️ Step 3: Secure the project's dependencies with AWS CodeArtifact
Key notes ✏️:
What is AWS CodeArtifact?
AWS CodeArtifact is a managed artifact repository service that makes it easy for organizations to securely store, publish, and share software packages used in their software development process. CodeArtifact seamlessly integrates with popular build and package management tools such as Maven, Gradle, npm, yarn, and pip. It's like a private storage locker that keeps a backup copy of all your project's dependencies. So that if a dependency faces an outage in the public repository that it comes from, developers can still access to the backup from CodeArtifact and continue building the project.
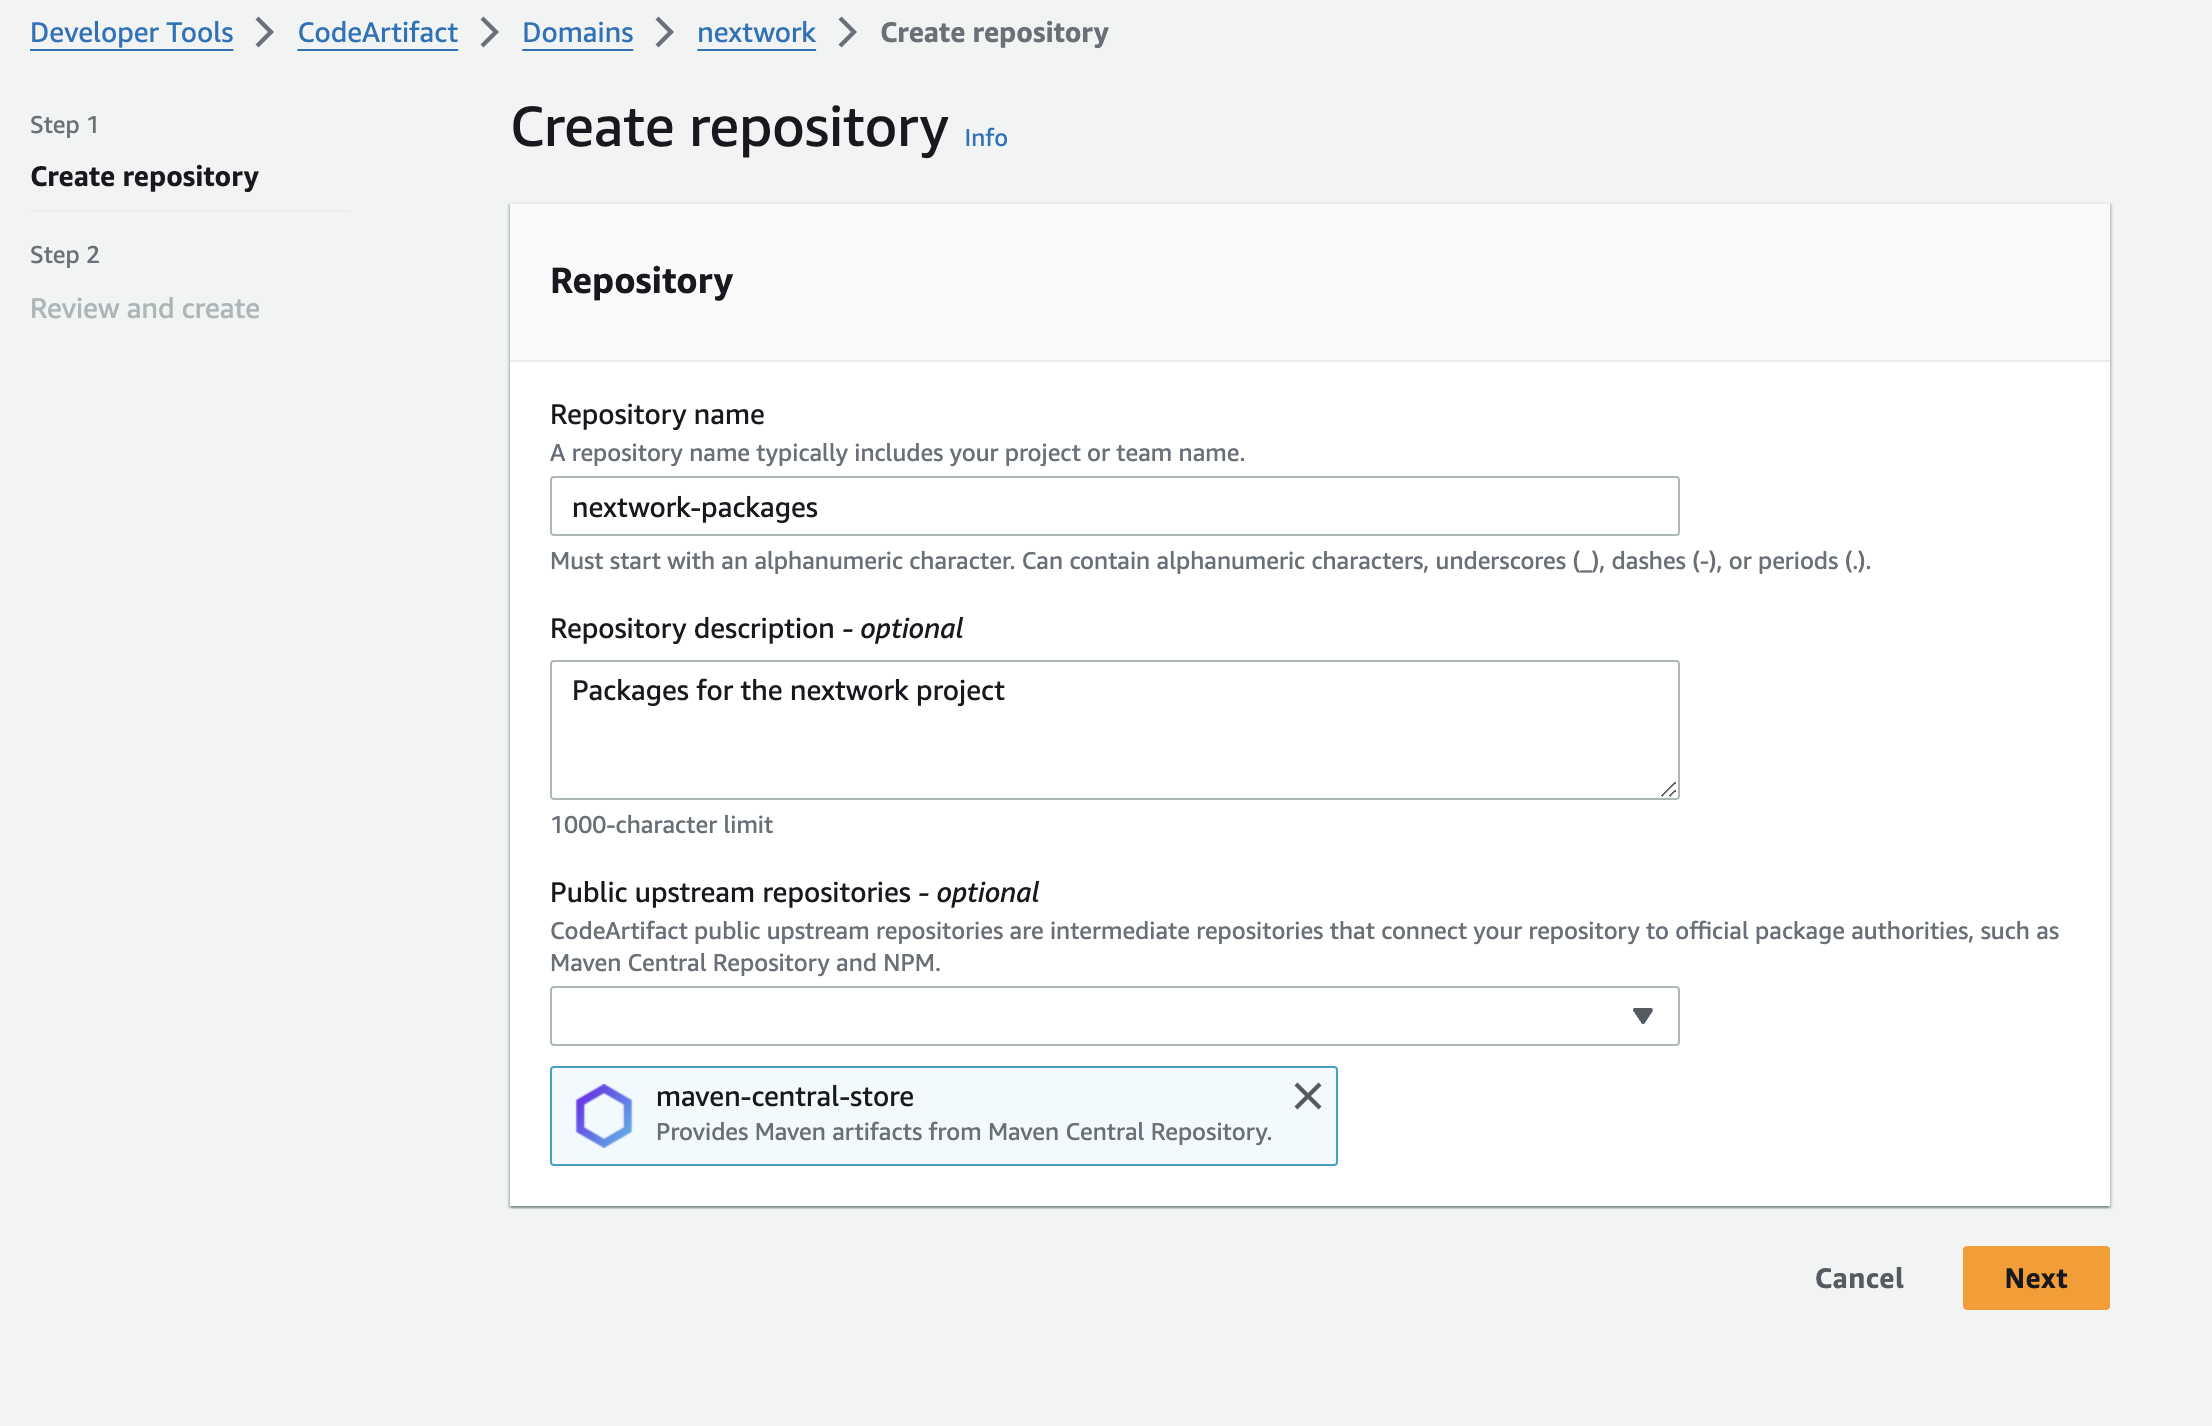
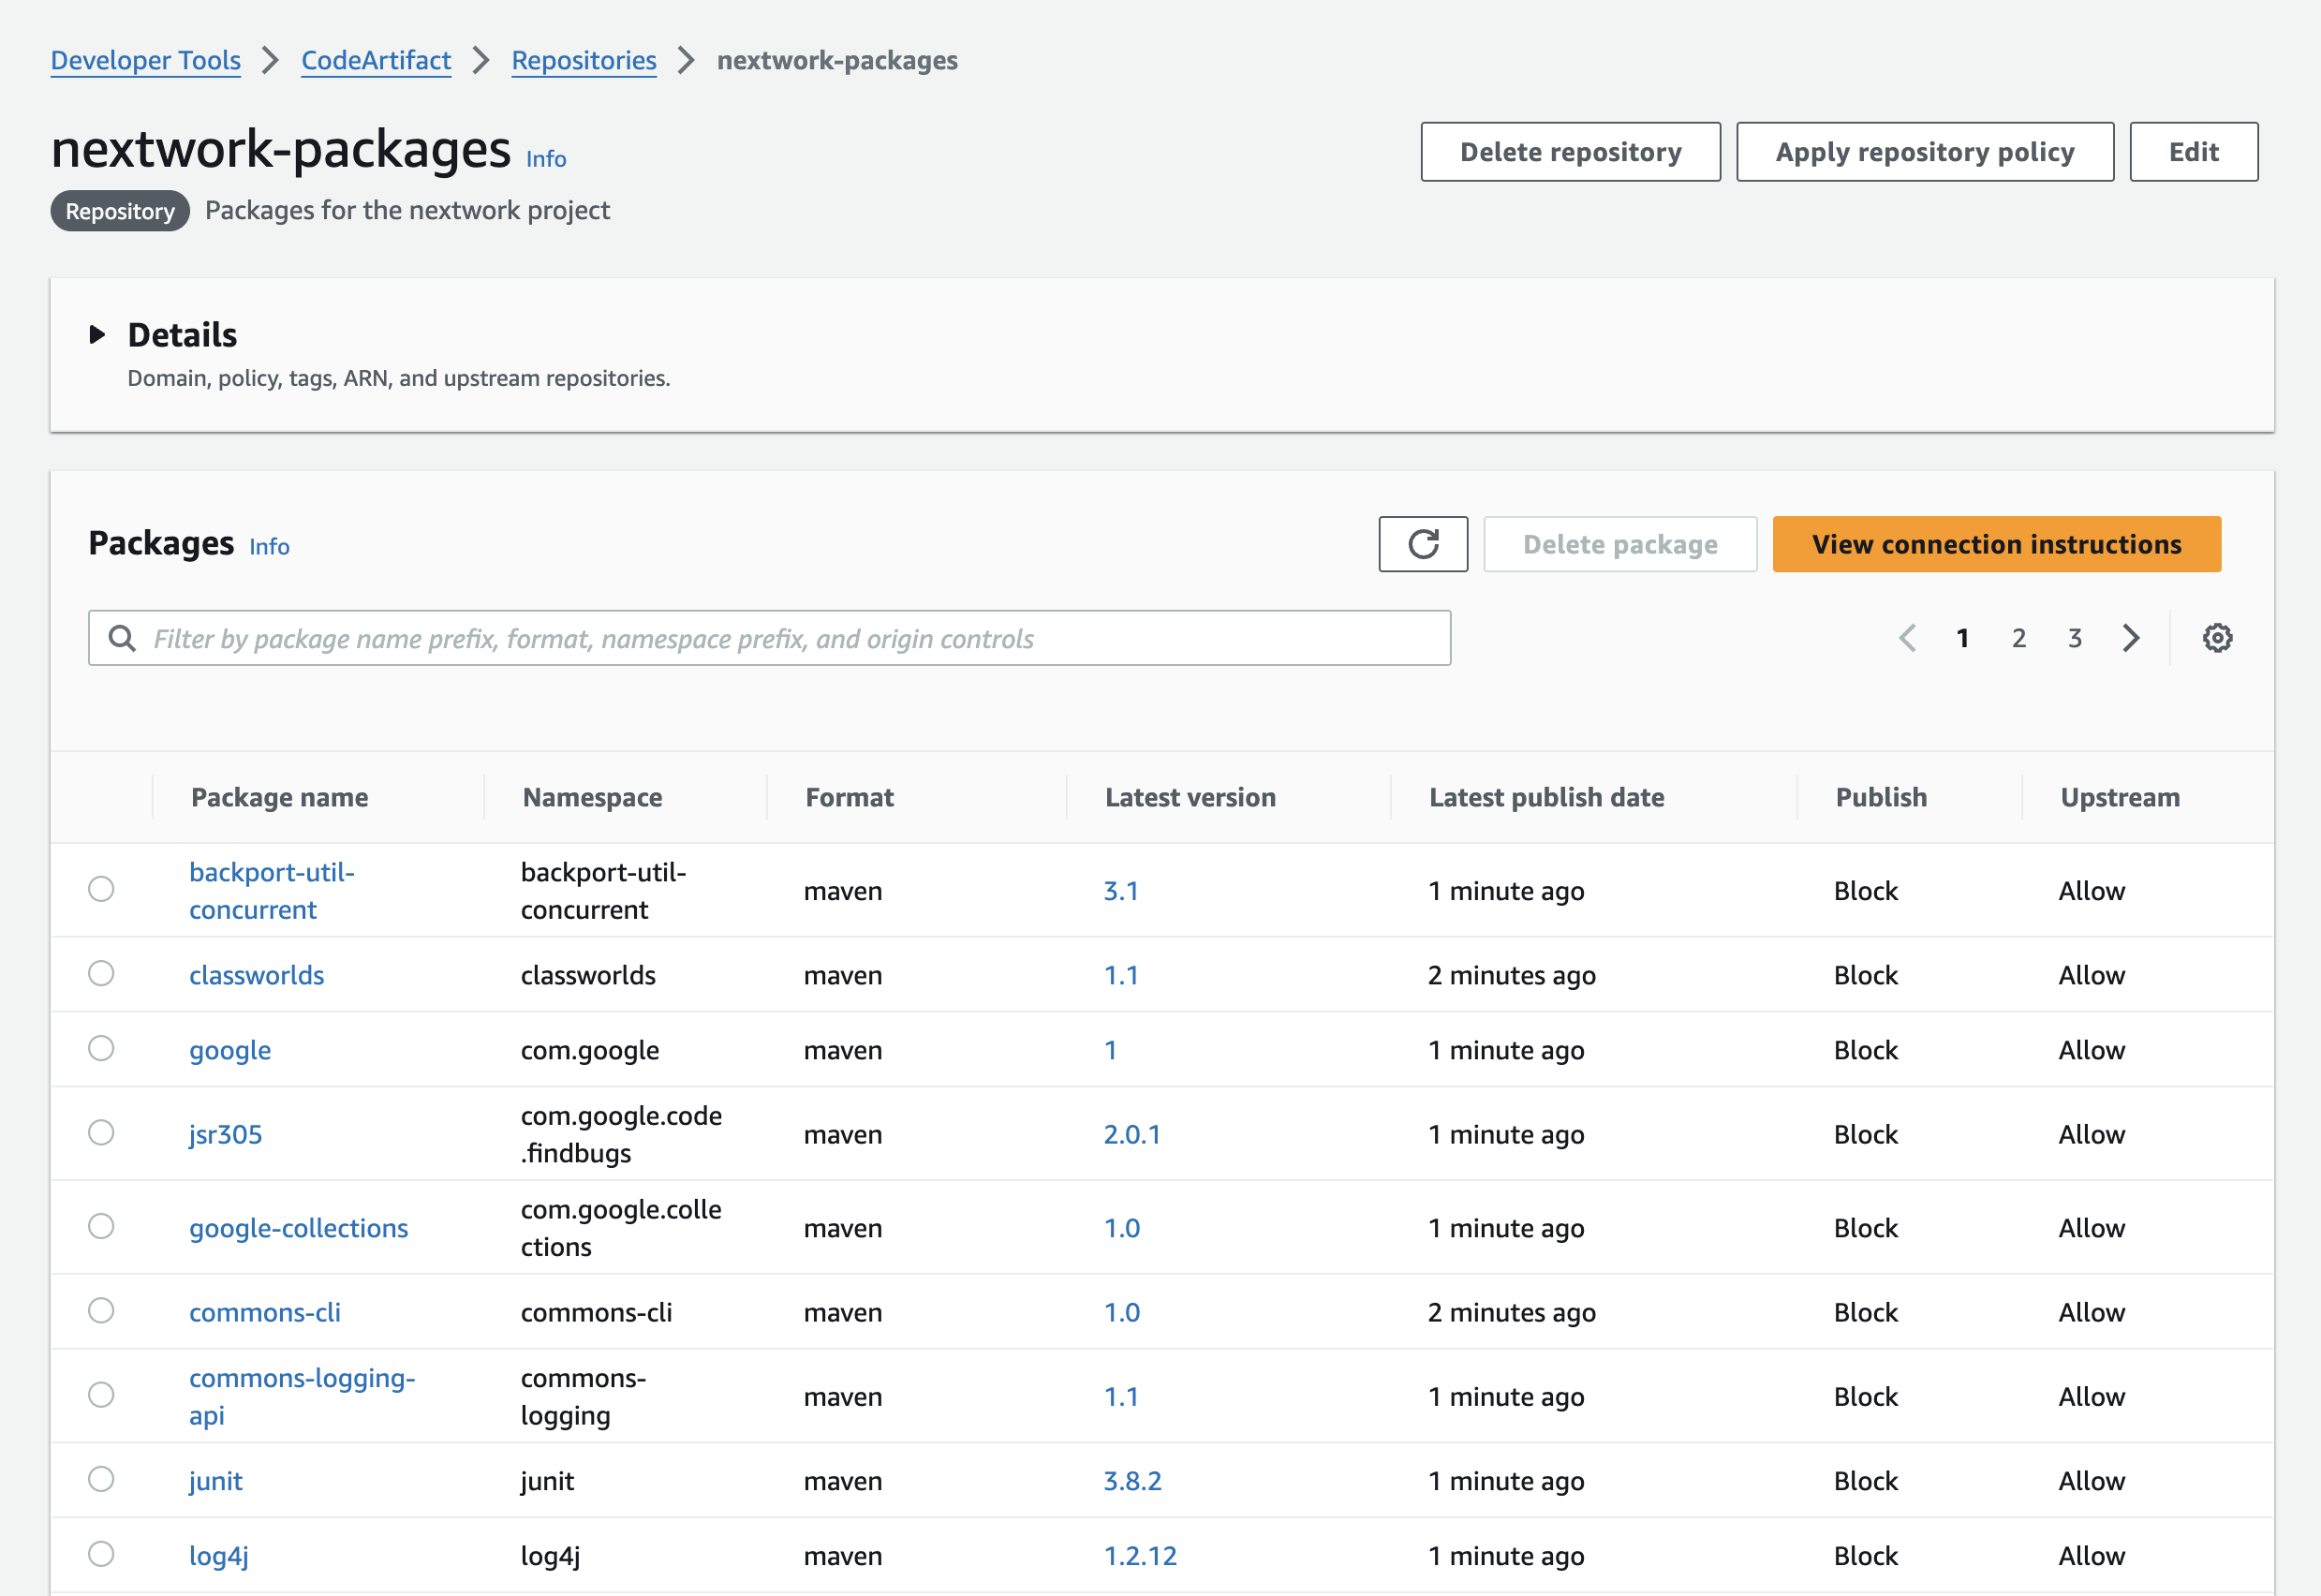
- Create a domain and a new repo called "nextwork-package" in it.
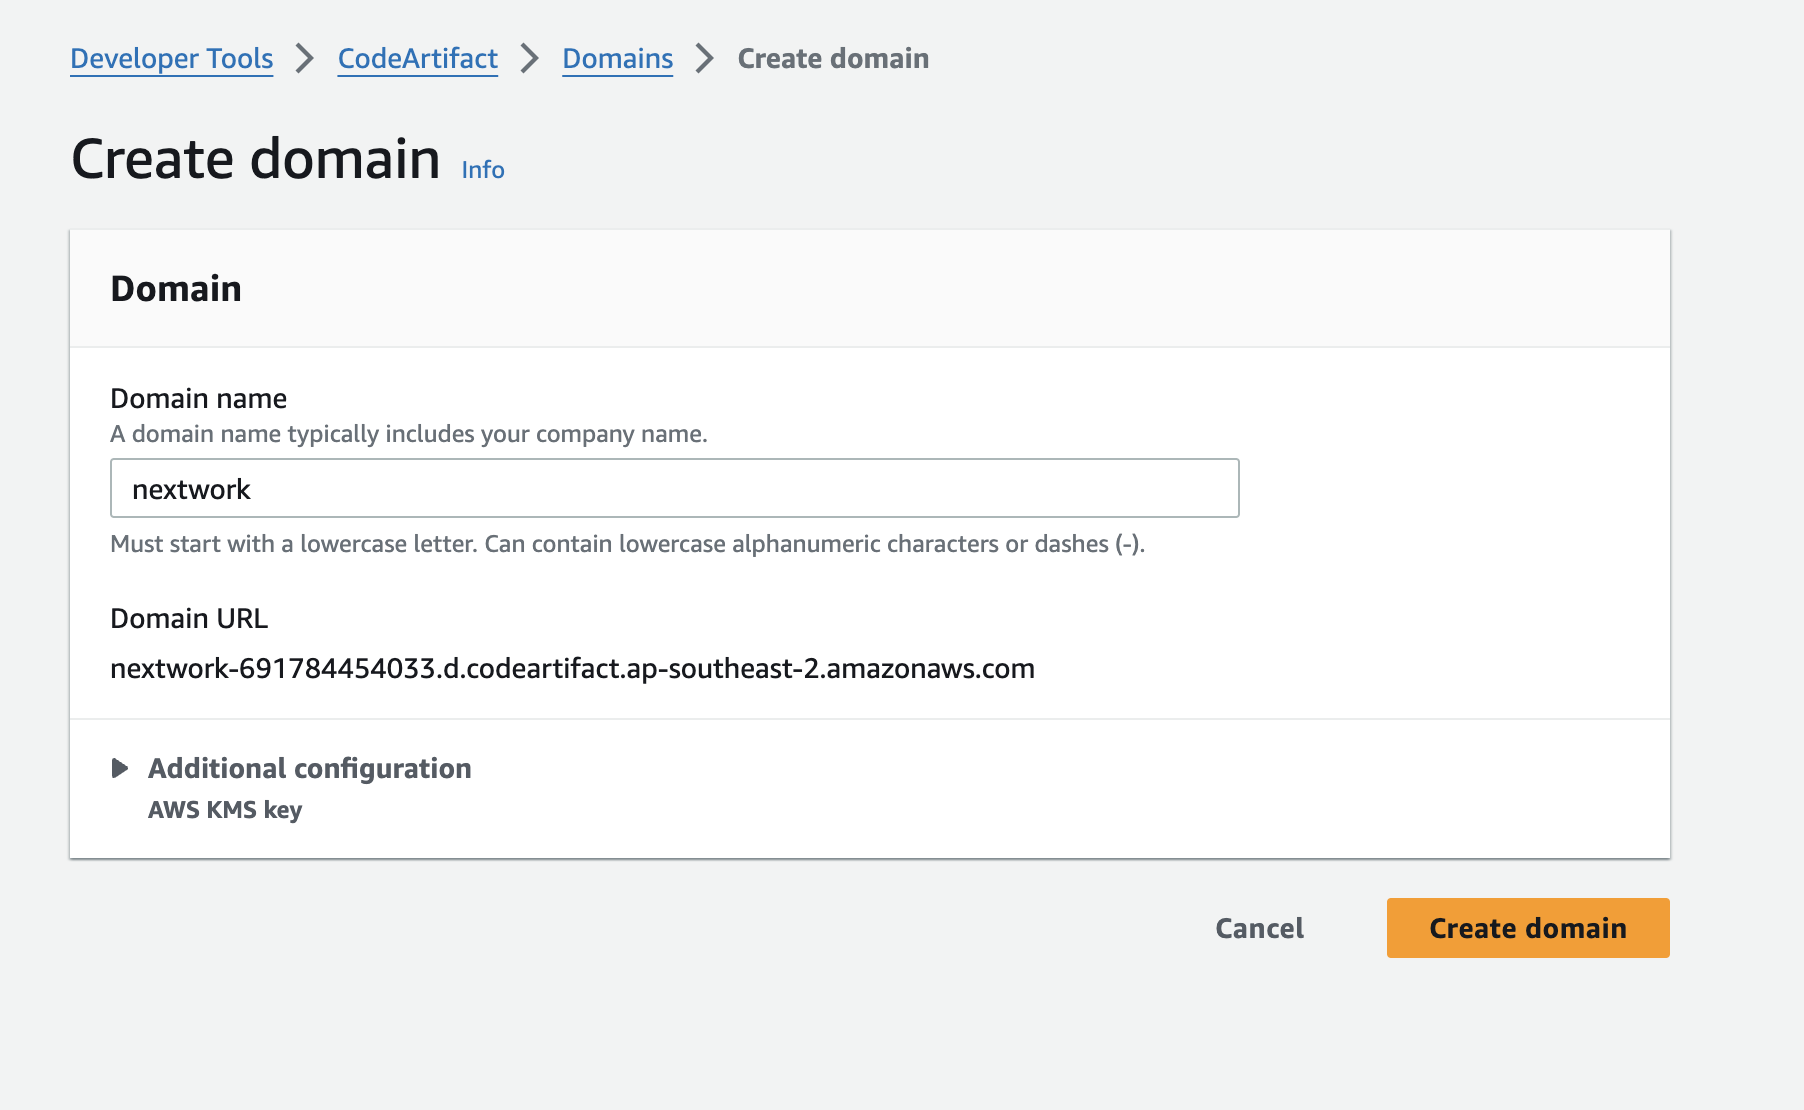
A domain in AWS CodeArtifact is like a big folder that can contains multiple repositories. It comes with a URL as the entry points for the project application to fetch and store the dependencies inside your domain.
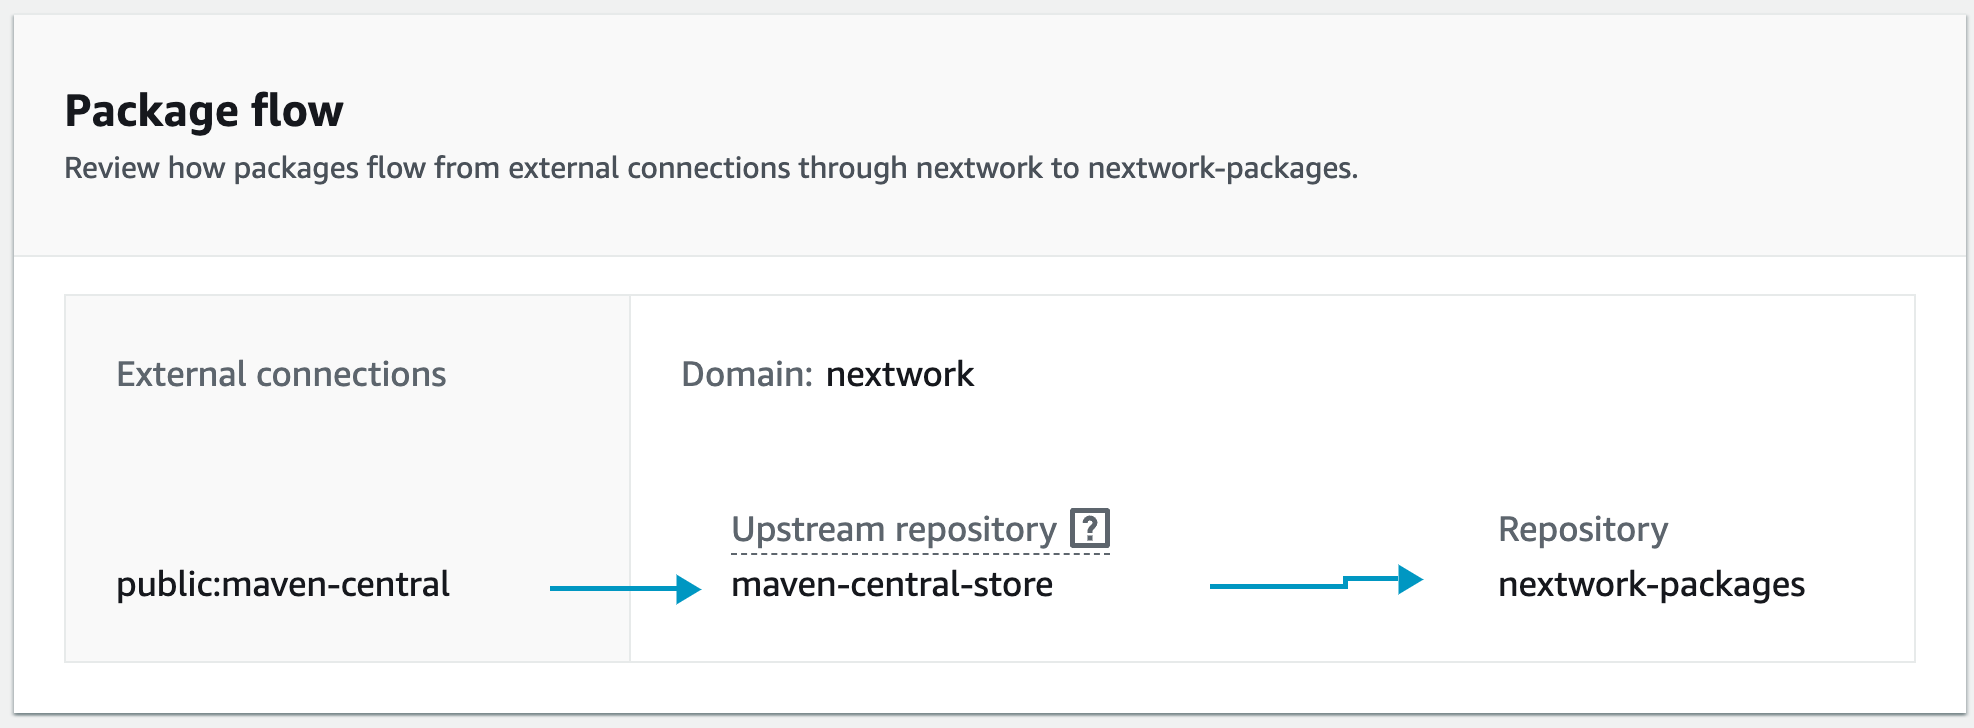
- Select "maven-central-store" as the public upstream repository.
The image below demonstrated the flow of, if the needed packages are not availabe in your local repository, how Maven checks the "maven-central-store" to get the packages, and visit the Maven Central Repository if a required package is not available in maven-central-store.
- Connect the CodeArtifact repository
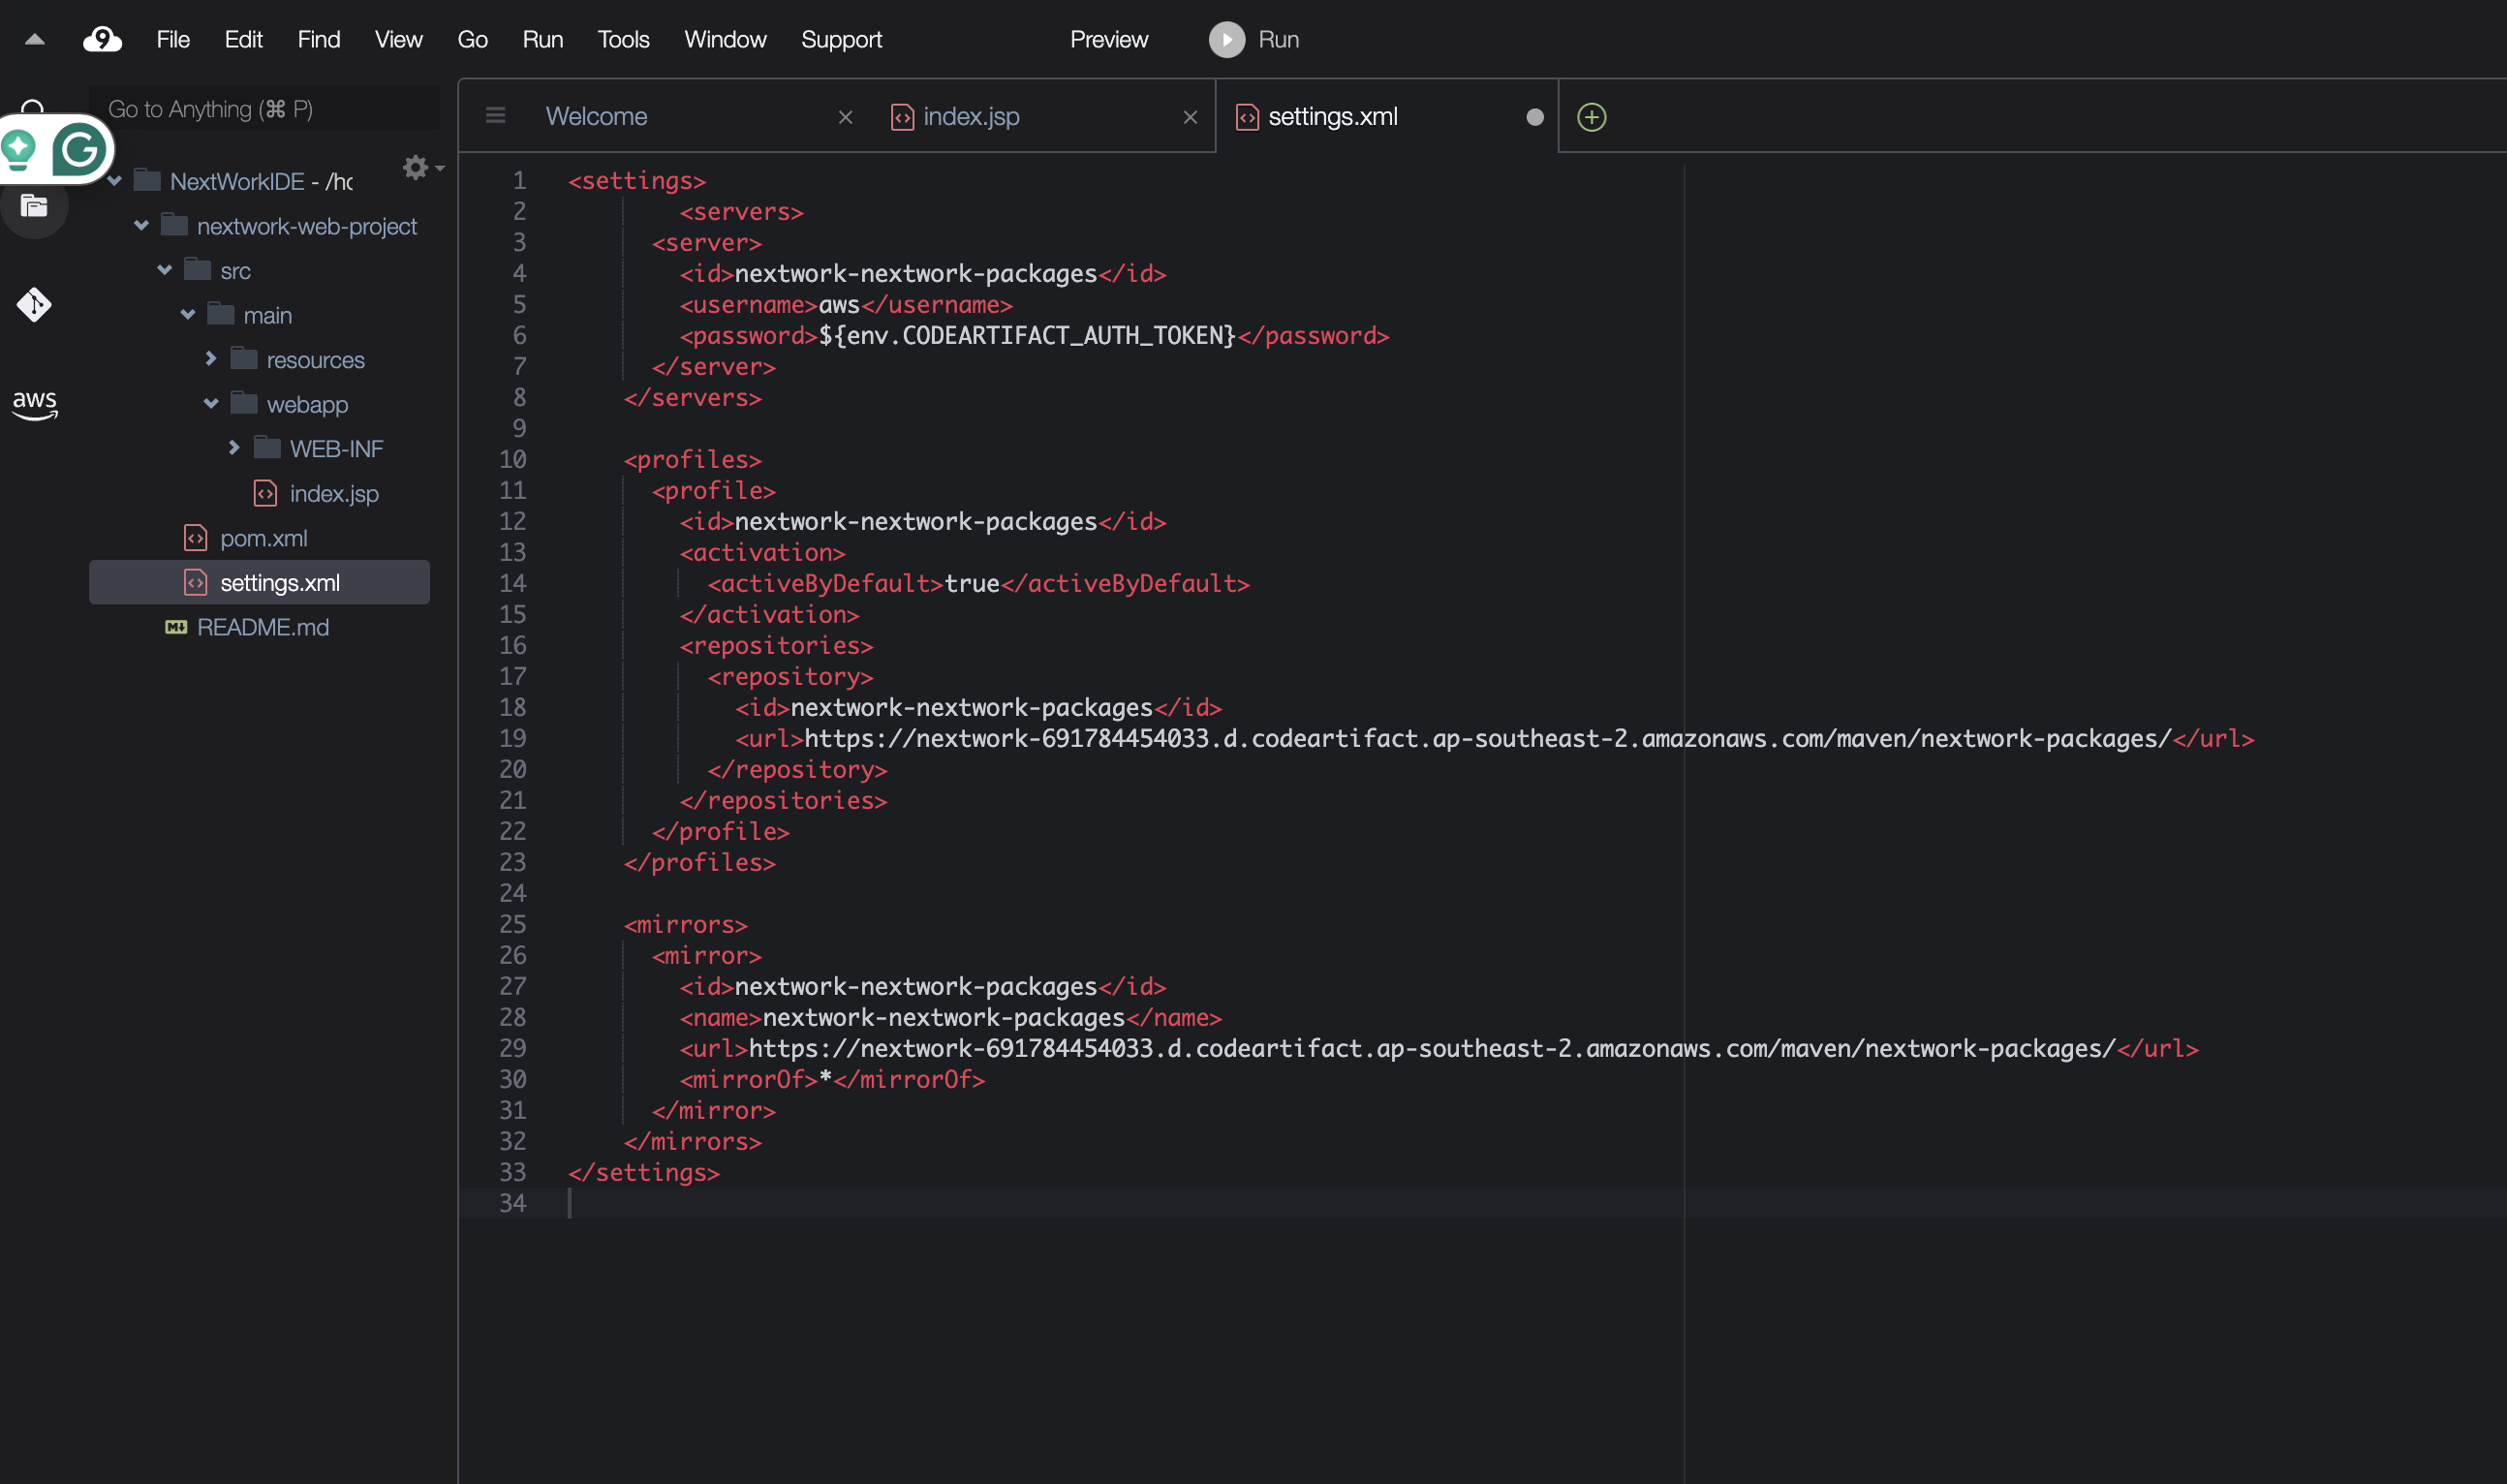
- Add a settings.xml file to the root of the project file in Cloud9.
- Follow the "View connection instructions" in the CodeArtifact repository.
-
Test the CodeArtifact Connection via Cloud9
- Run "mvn -s settings.xml compile" to compile the code based on the settings in the setting.xml file.
- After the compile success, all the dependencies appear in the "nextwork-package" repo in CodeArtifact
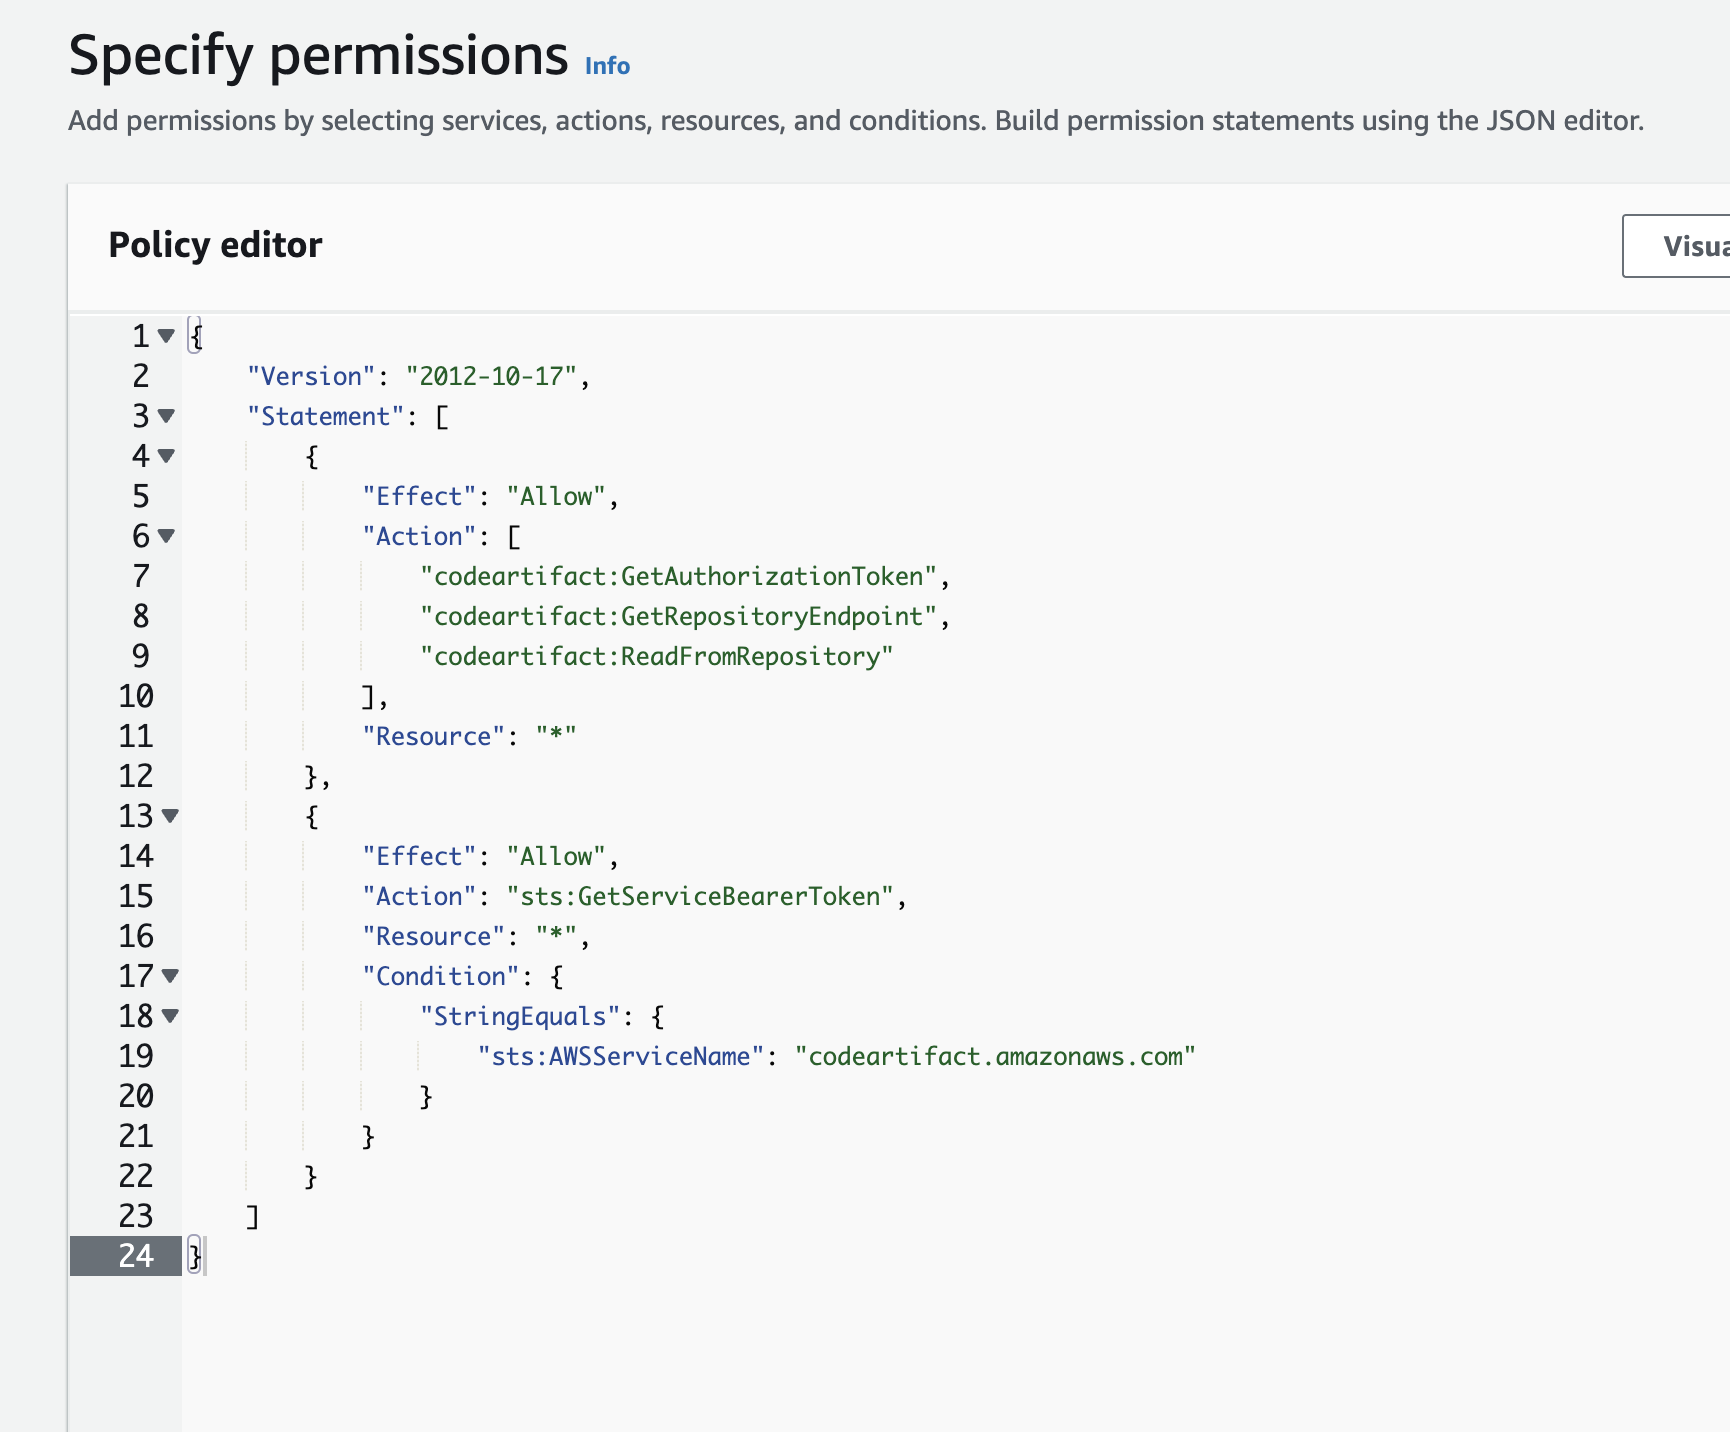
- Set up an IAM Policy for using CodeArtifact
In the next project (part three), I'm going to build the project using CodeBuild.