June 2024
Package an App with AWS CodeBuild
In this project, I learned how to:
- 💡 Set up an S3 bucket to store the post-build WAR file.
- 💡 Create a CodeBuild build project with CodeCommit as source.
- 💡 Create buildspec.yml file.
- 💡 Modify the IAM role.
- 💡 Test the debug the build.
✅ Steps completed from previous project sections:
Step 1: Setting up a web app and IDE in the Cloud
Step 2: Create a Repository in AWS CodeCommit
Step 3: Secure the project's dependencies with AWS CodeArtifact
⏭️ Step 4: Package an App with AWS CodeBuild
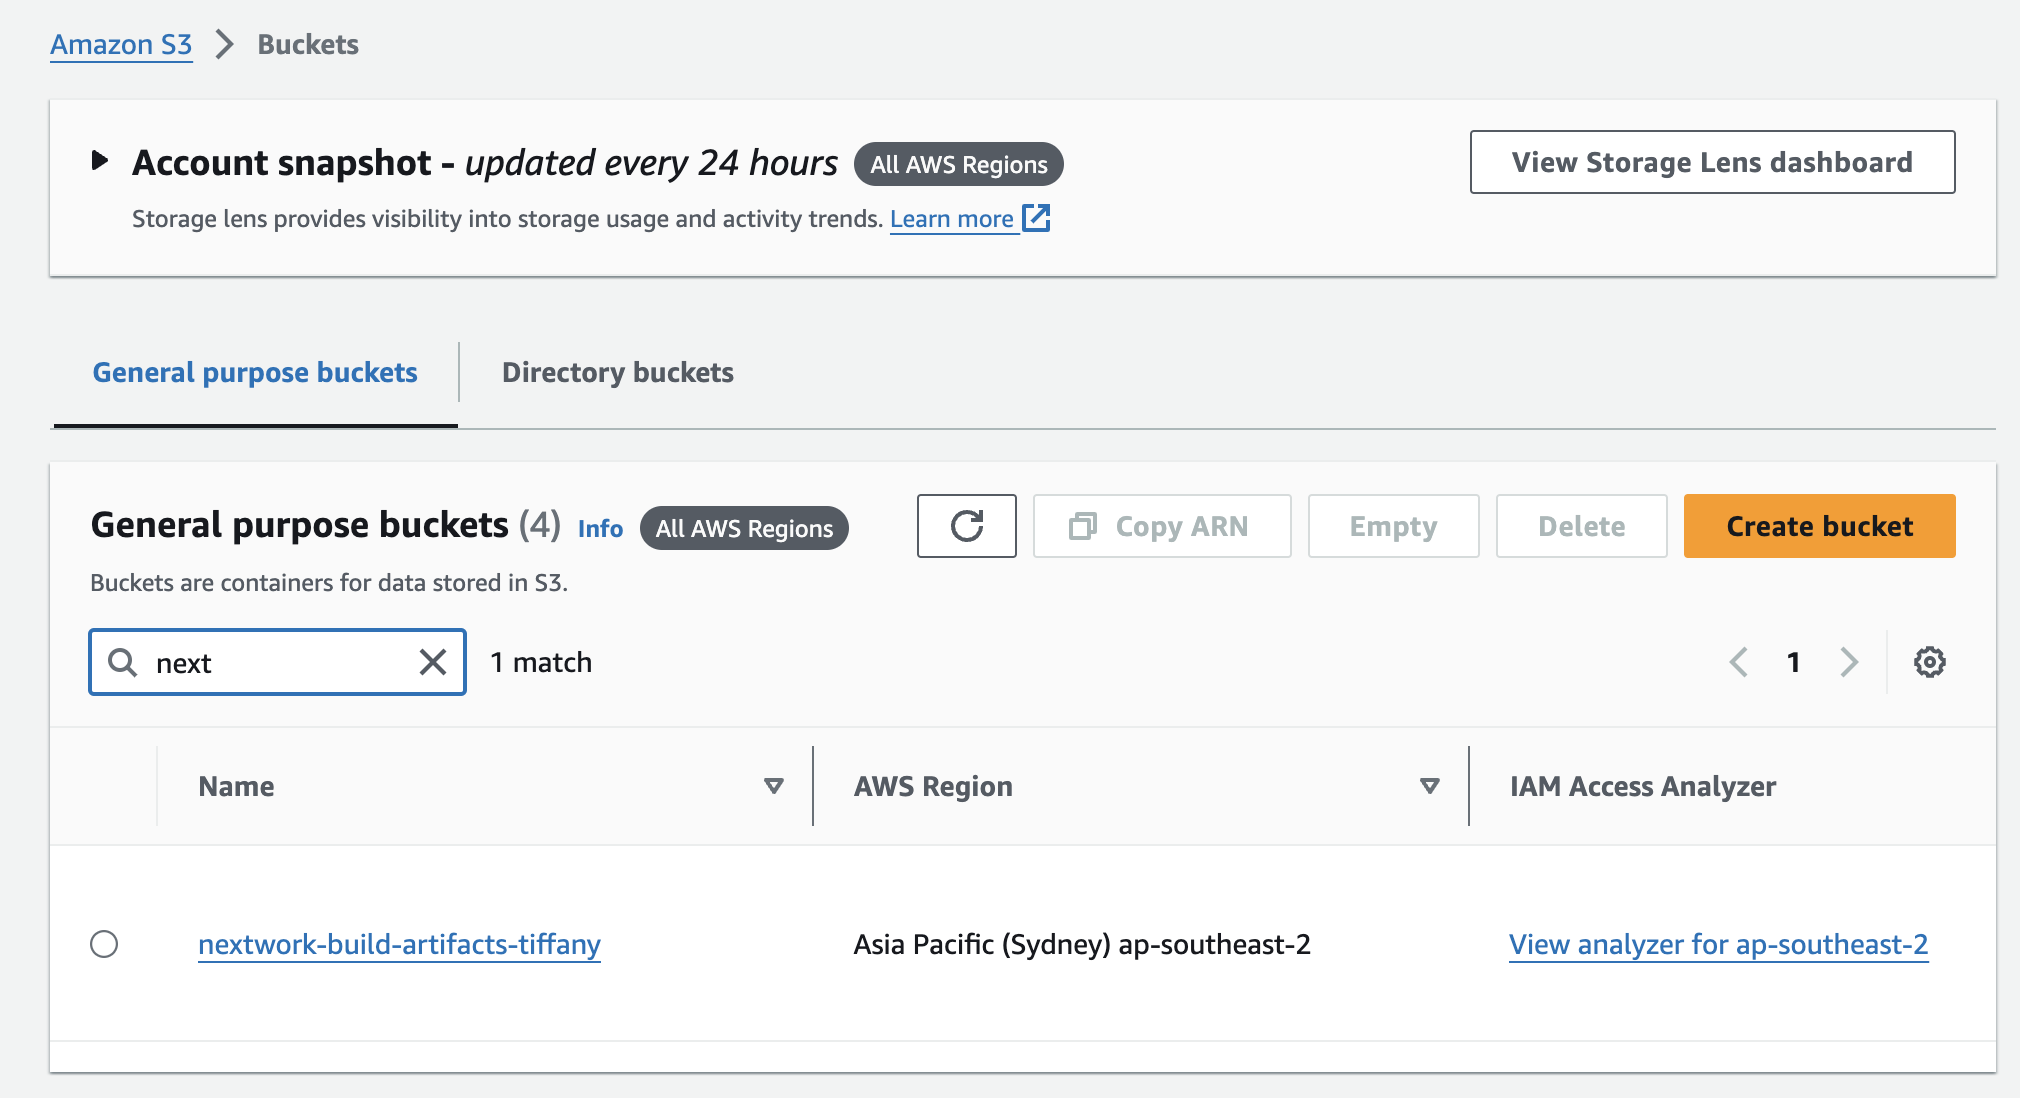
1. Set up an S3 bucket to store the WAR file
Key notes ✏️:
What is WAR file?
The build process will translate the app's code into machine code that computers (servers) can understand and run. Building includes the steps like compiling the code, running tests, and packaging the application. After successfully going through those steps, files called "build artifacts" will be created that packs up a bundle for the server to host the app. The bundle is called a WAR (Web Application Resource) file. When hosting, the server will "unzip" this WAR file get files and resources needed host your web app straight away.
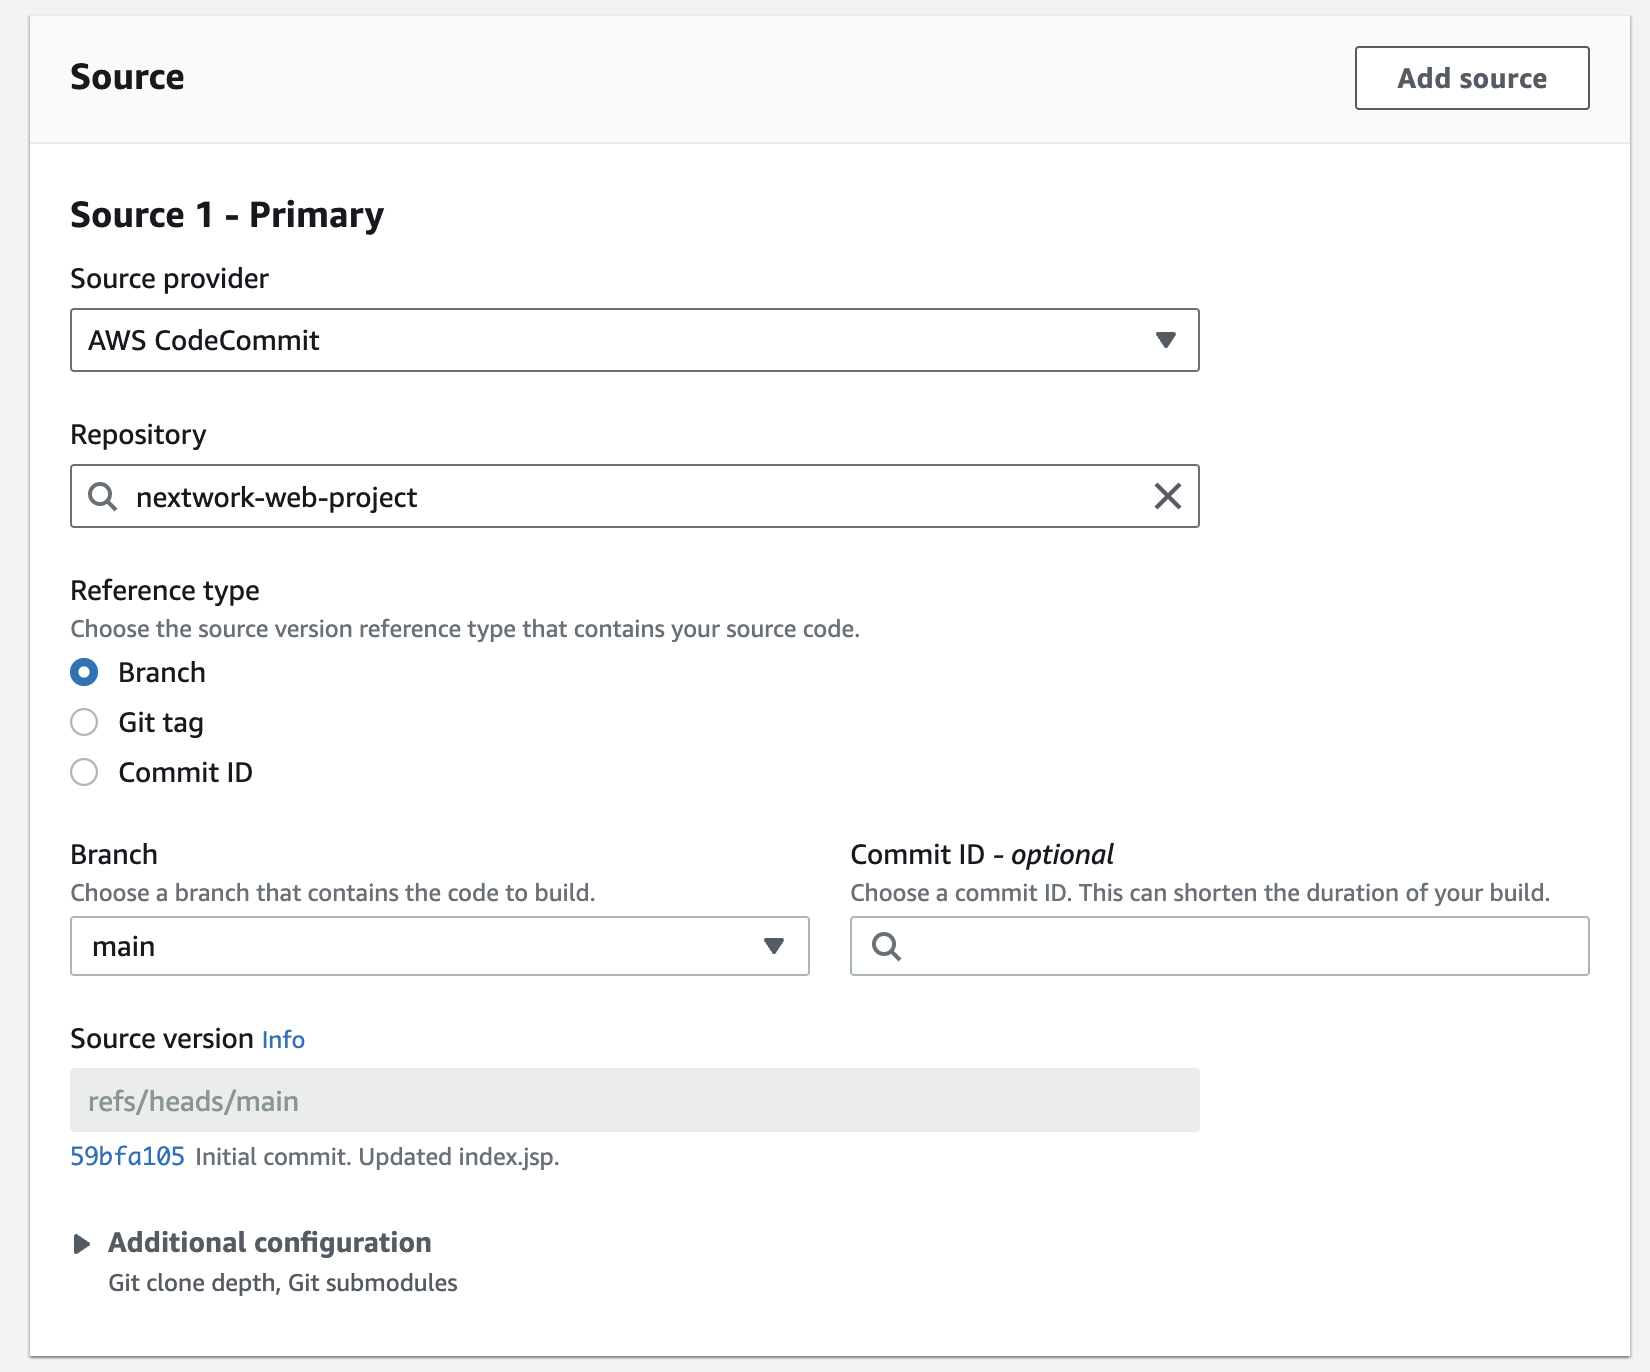
2. Create a build project in CodeBuild
- Config the source. Set the CodeCommit repo as resource. CodeBuild will fetch the repo from the CodeCommit, and compile and package into a WAR file. Code stored in Amazon S3, GitHub, Bitbucket and other providers can also be source for CodeBuild!
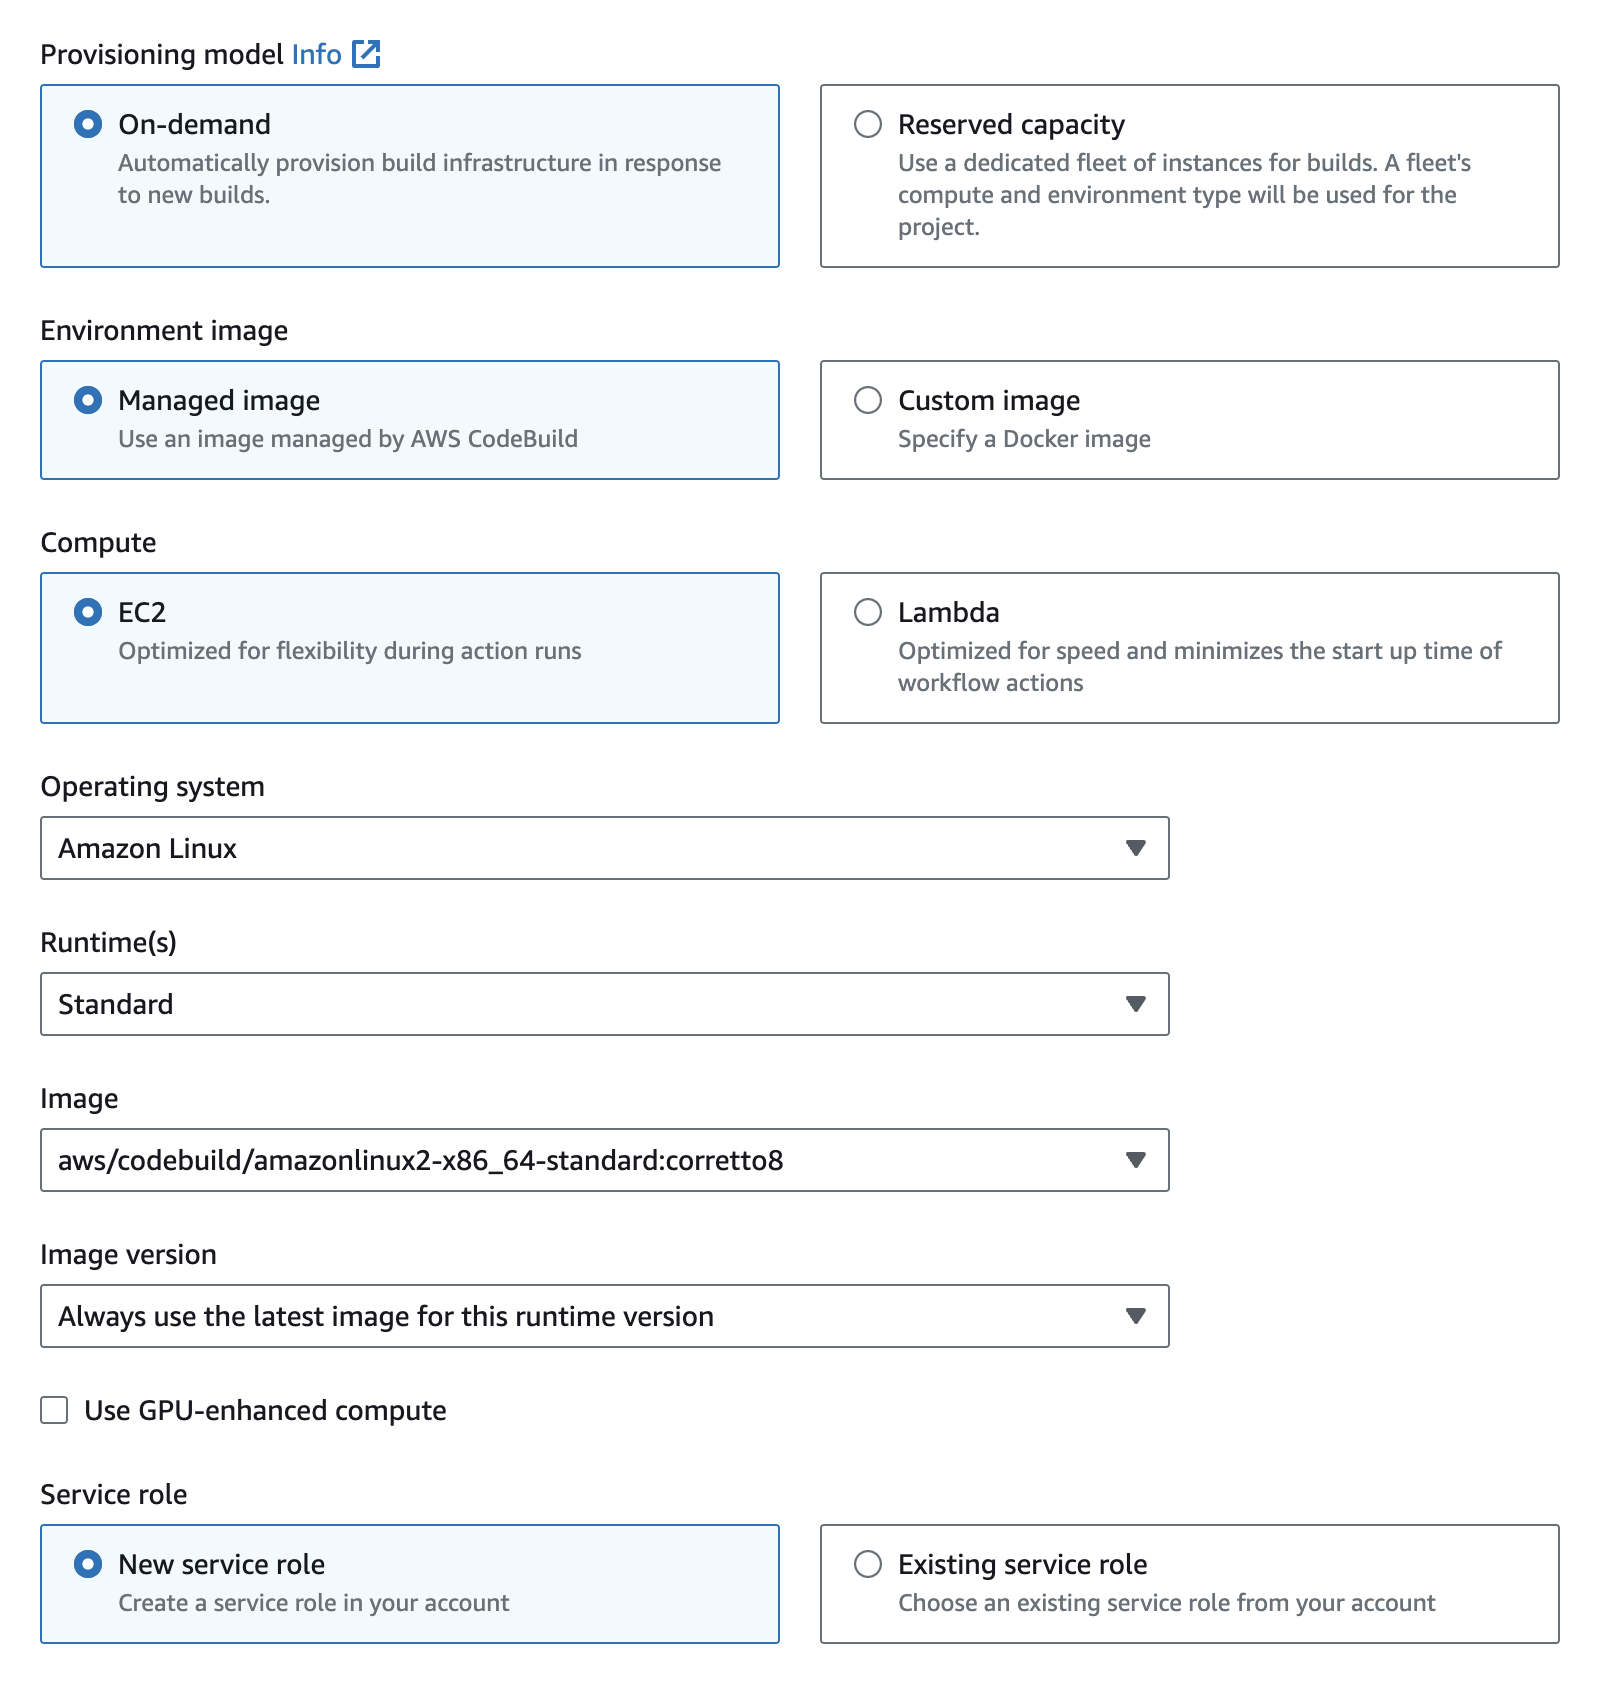
- Config the environment
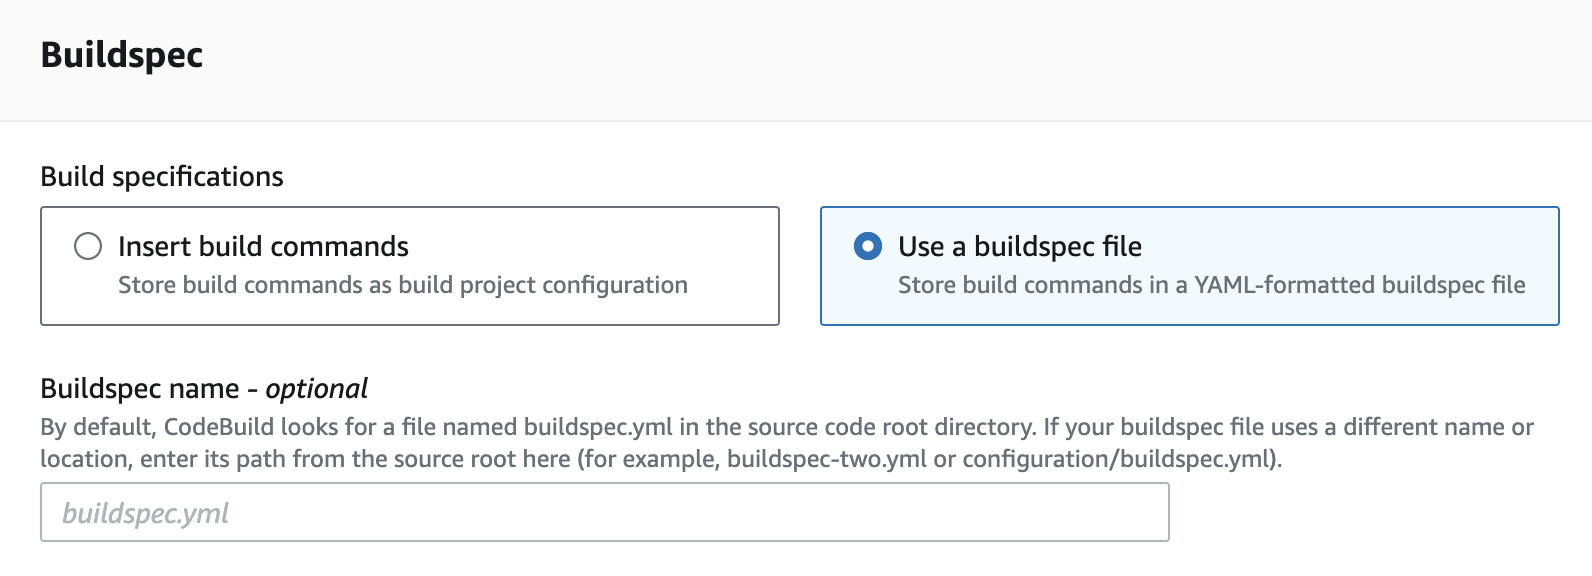
- Choose a use buildspec.yml file
- Config the build artifacts to set the S3 bucket to store the WAR file that will be produced.

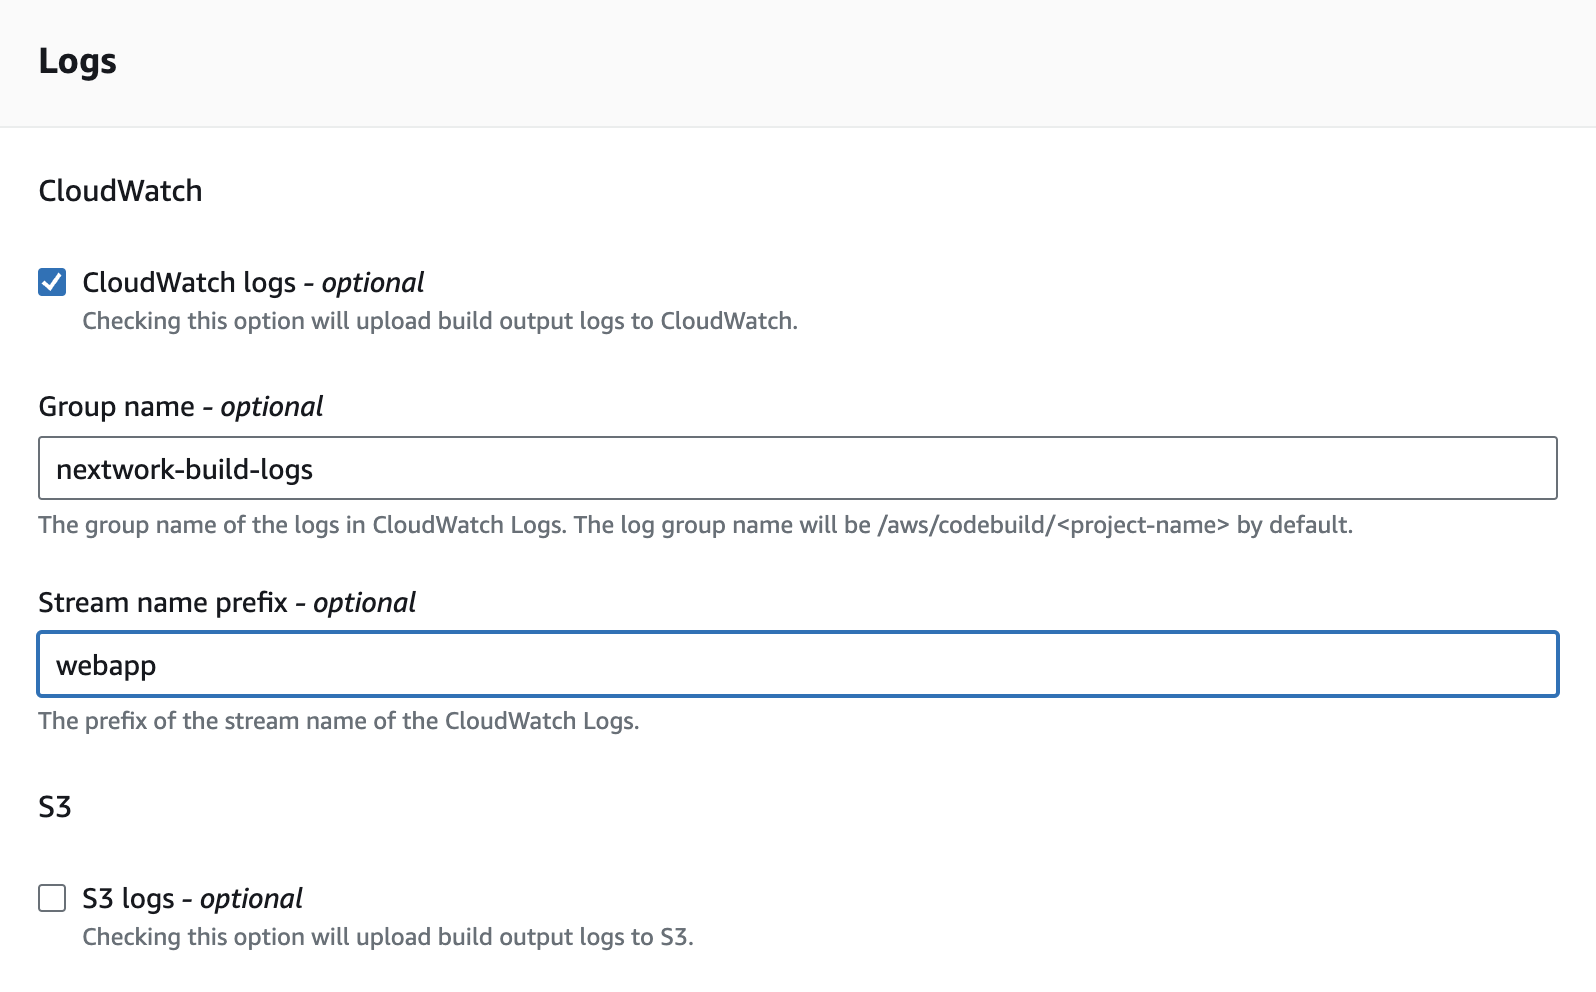
- Config CloudWatch log. so that I can keep an eye on a record of what exactly happens during the build process. Very helpful for dignose issues when error occurs.
3. Modify the service role
The new service role created by CodeBuild only gave minimum permissions which by default does not include access to CodeArtifact repository. So here I attach the "codeartifact-nextwork-consumer-policy" that I created in CodeArtifact to the service role.

4. Create the buildspec.yml file
Key notes ✏️:
What is buildspec.yml for?
This file configures the commands that CodeBuild will run line by line to build the web app. Having a buildspec.yml file makes sure that every build follows the same steps and produces consistent results.

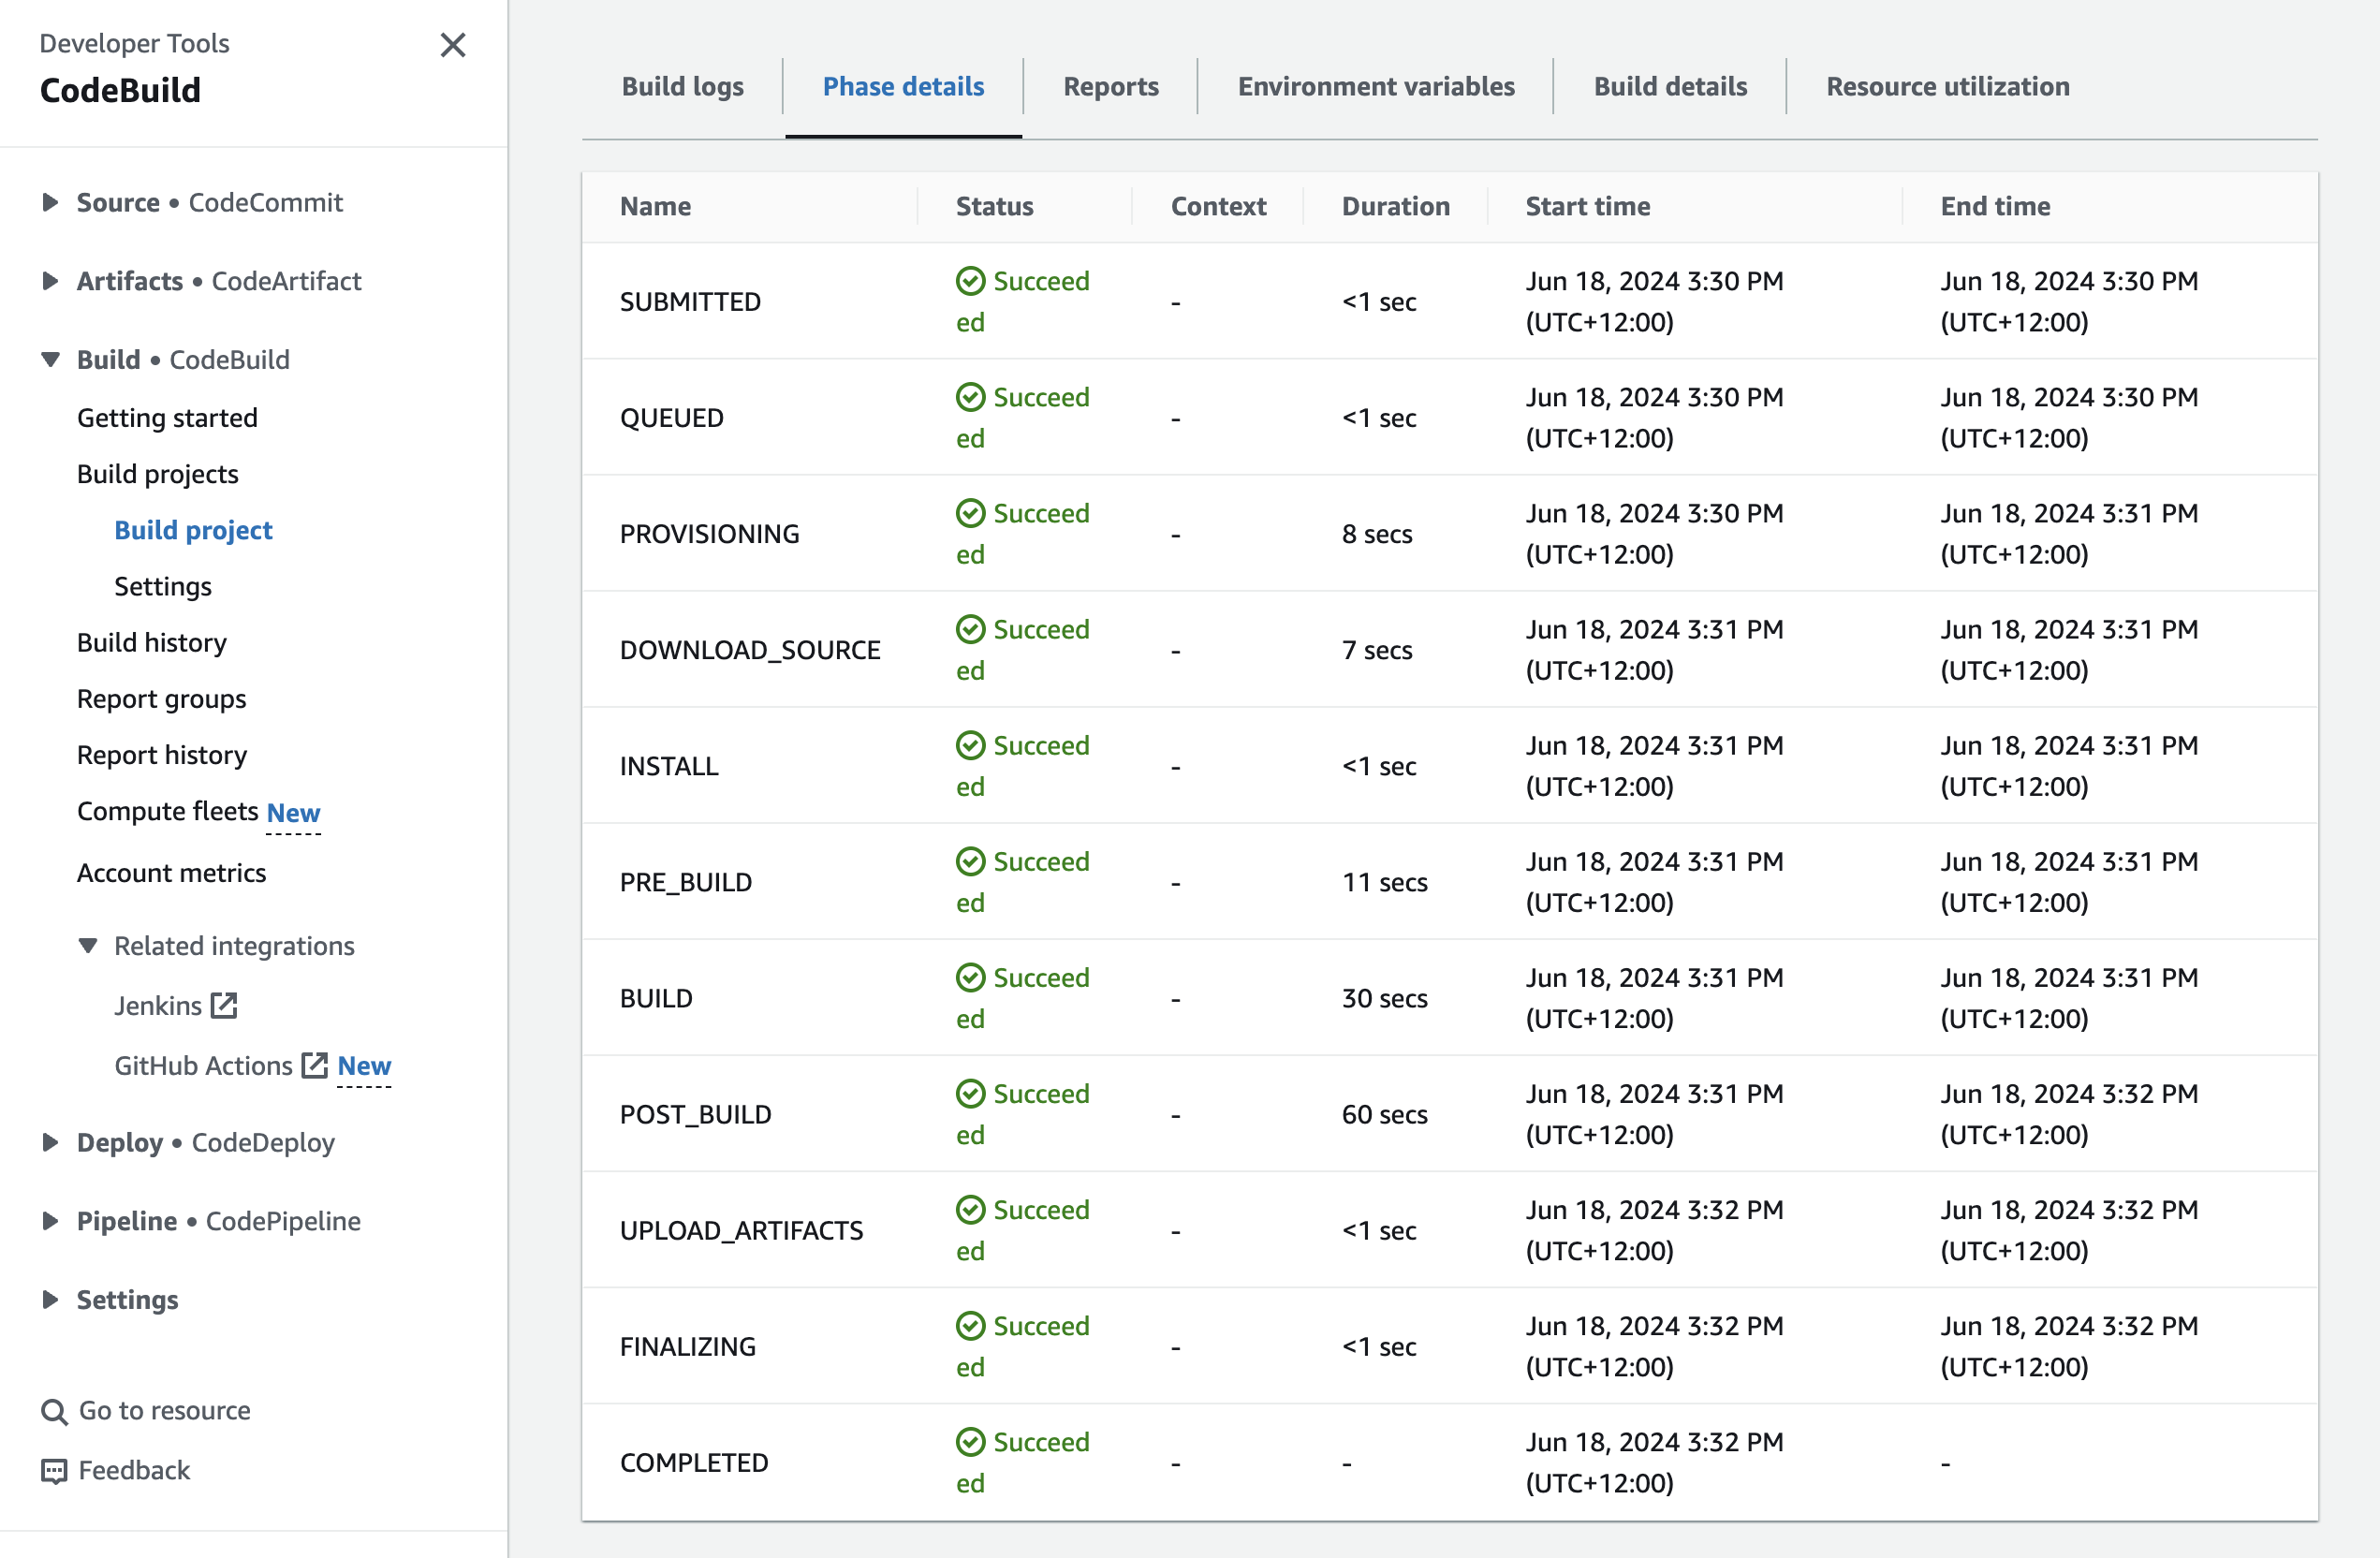
4. Start the build
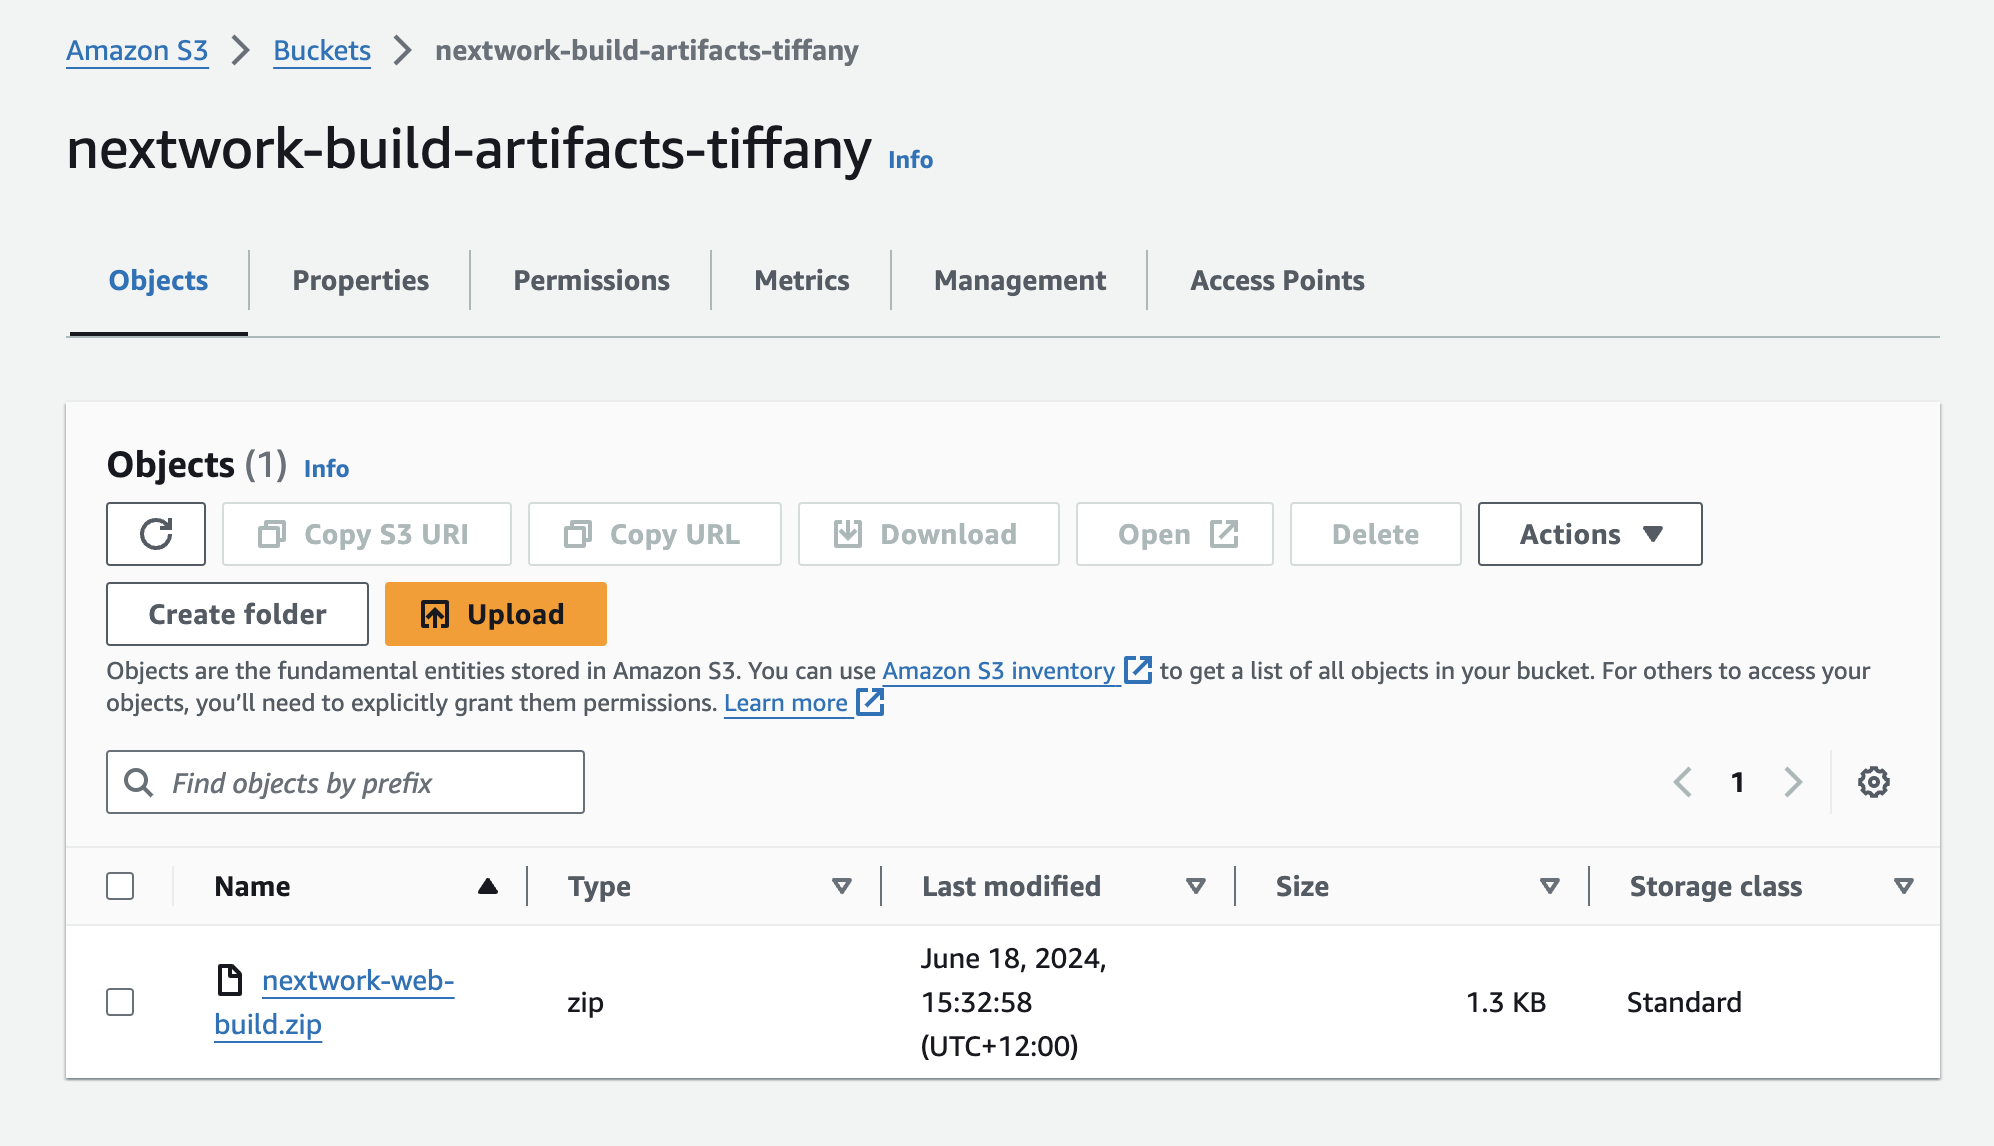
5. Check the S3 bucket
The .zip file that contains the WAR file appears in the bucket. The build is done 🎉
In the next project (part four), I'm going to deploy the project based on the WAR file that CodeBuild produced.