June 2024
Automate software releases with AWS CodePipeline
In this project, I learned how to:
- 💡 Set up the pipeline.
- 💡 Execute the pipeline.
- 💡 Release a change.
- 💡 Trigger a rollback.
✅ Steps completed from previous project sections:
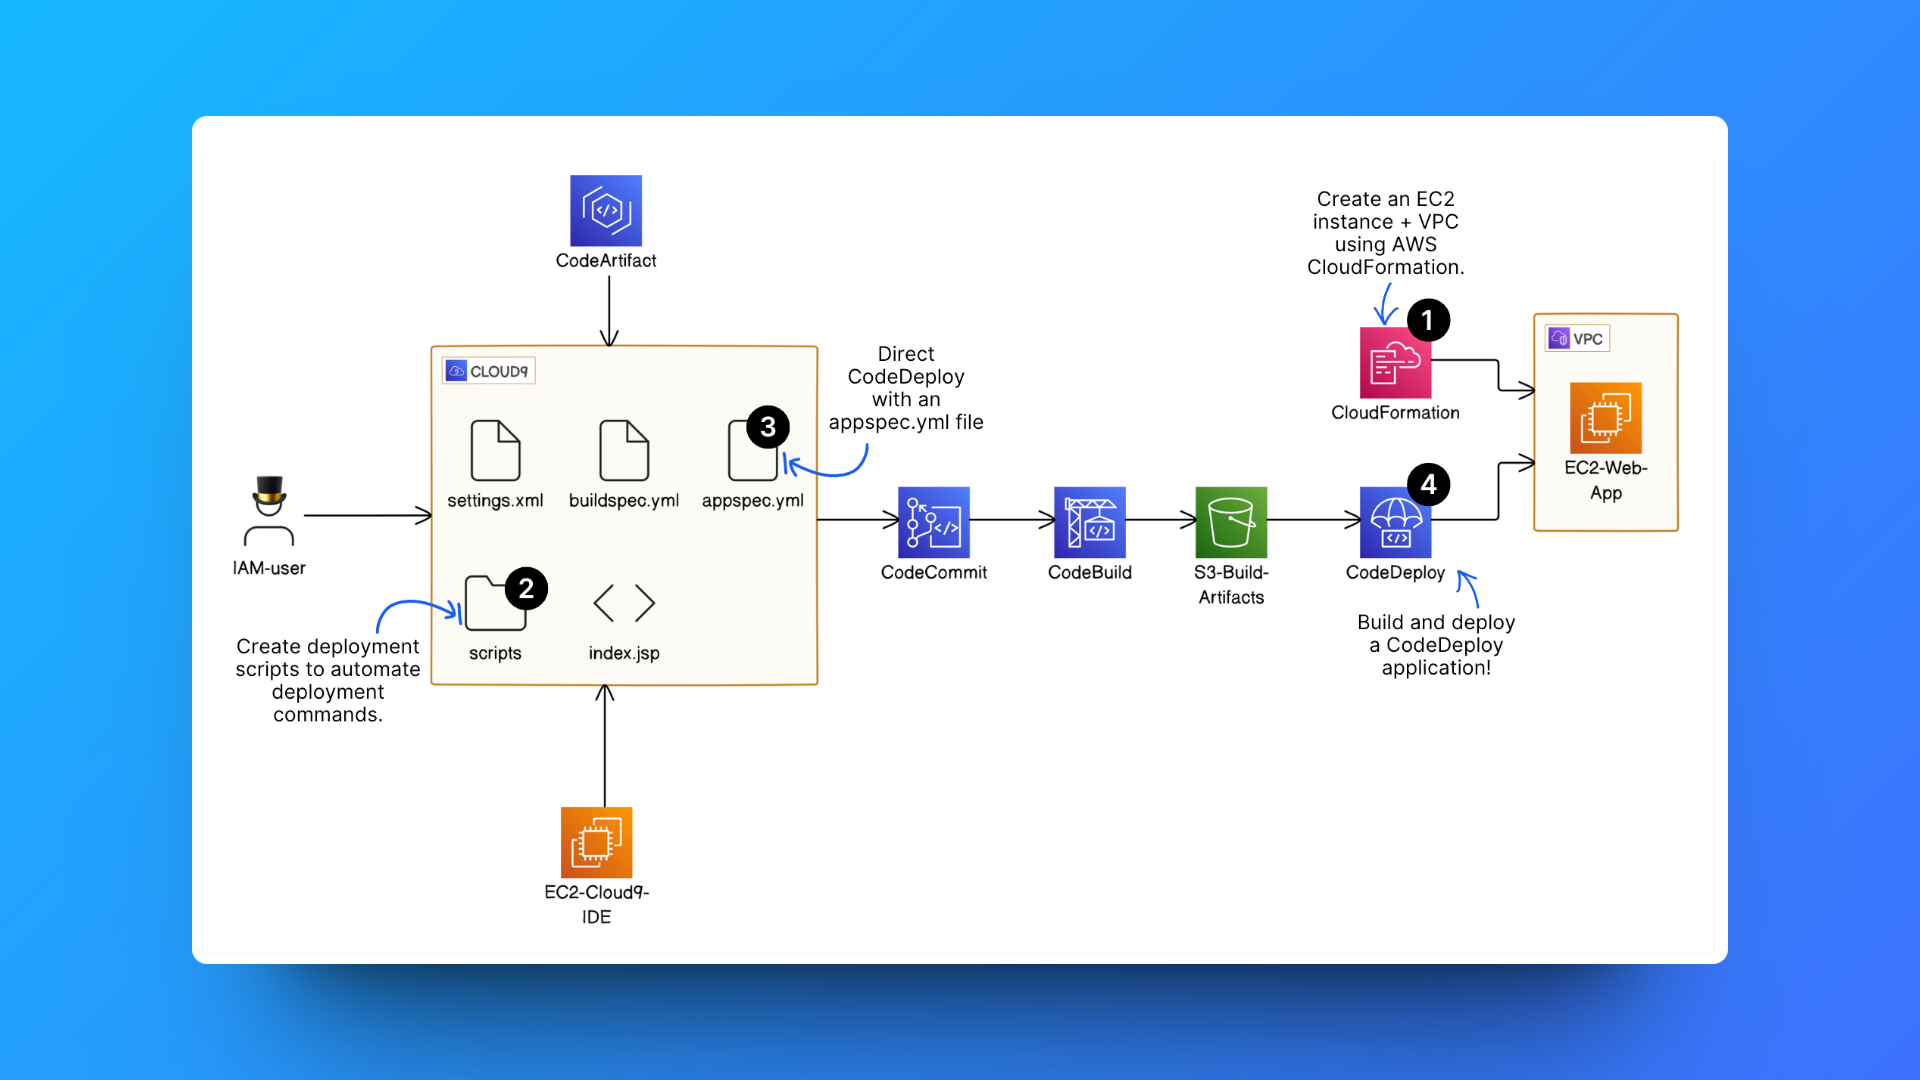
Step 1: Setting up a web app and IDE in the Cloud
Step 2: Create a Repository in AWS CodeCommit
Step 3: Secure the project's dependencies with AWS CodeArtifact
Step 4: Package an App with AWS CodeBuild
Step 5: Deploy the App with AWS CodeDeploy
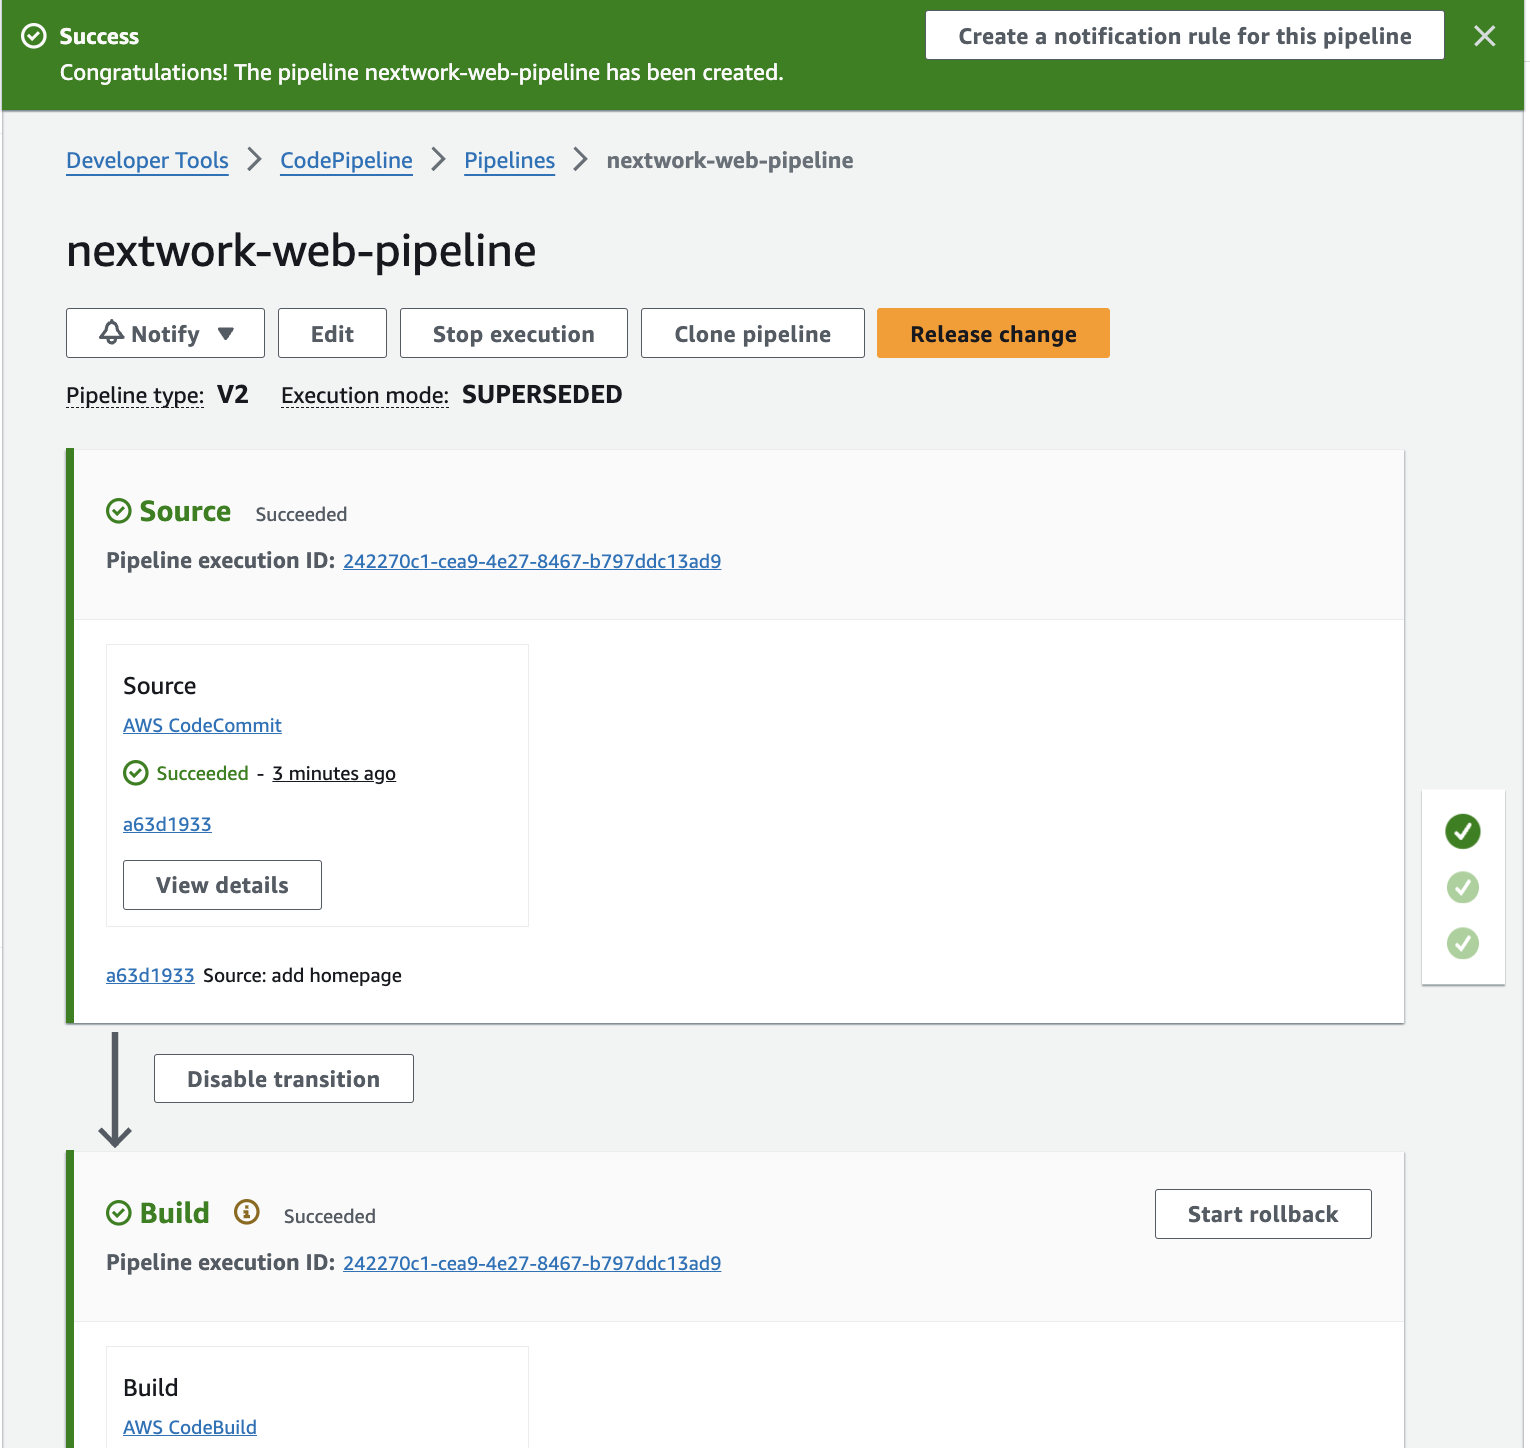
⏭️ Step 6: Automate the entire pipeline (from CodeCommit to CodeDeploy) with AWS CodePipeline.
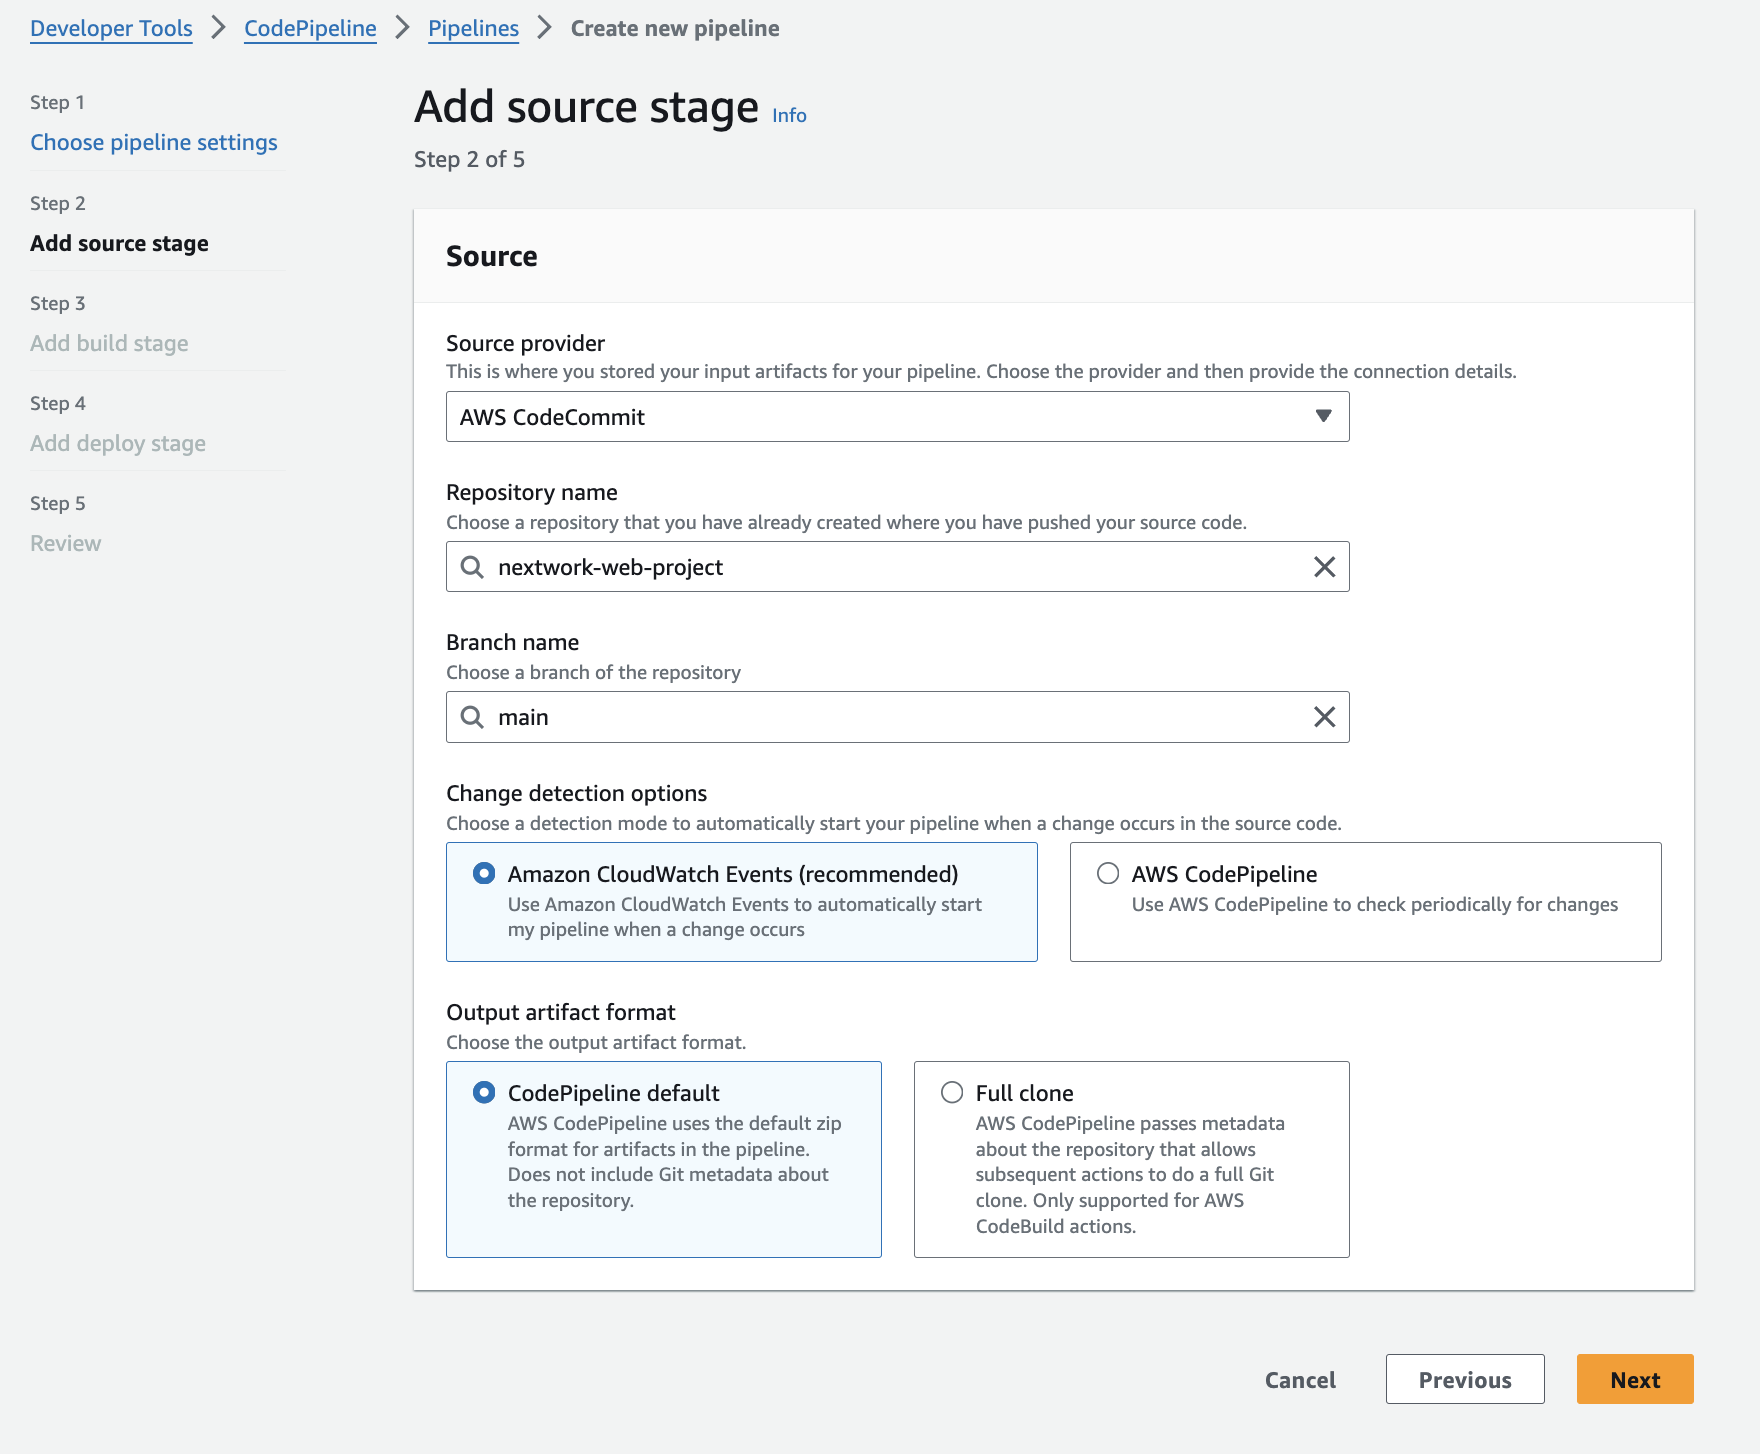
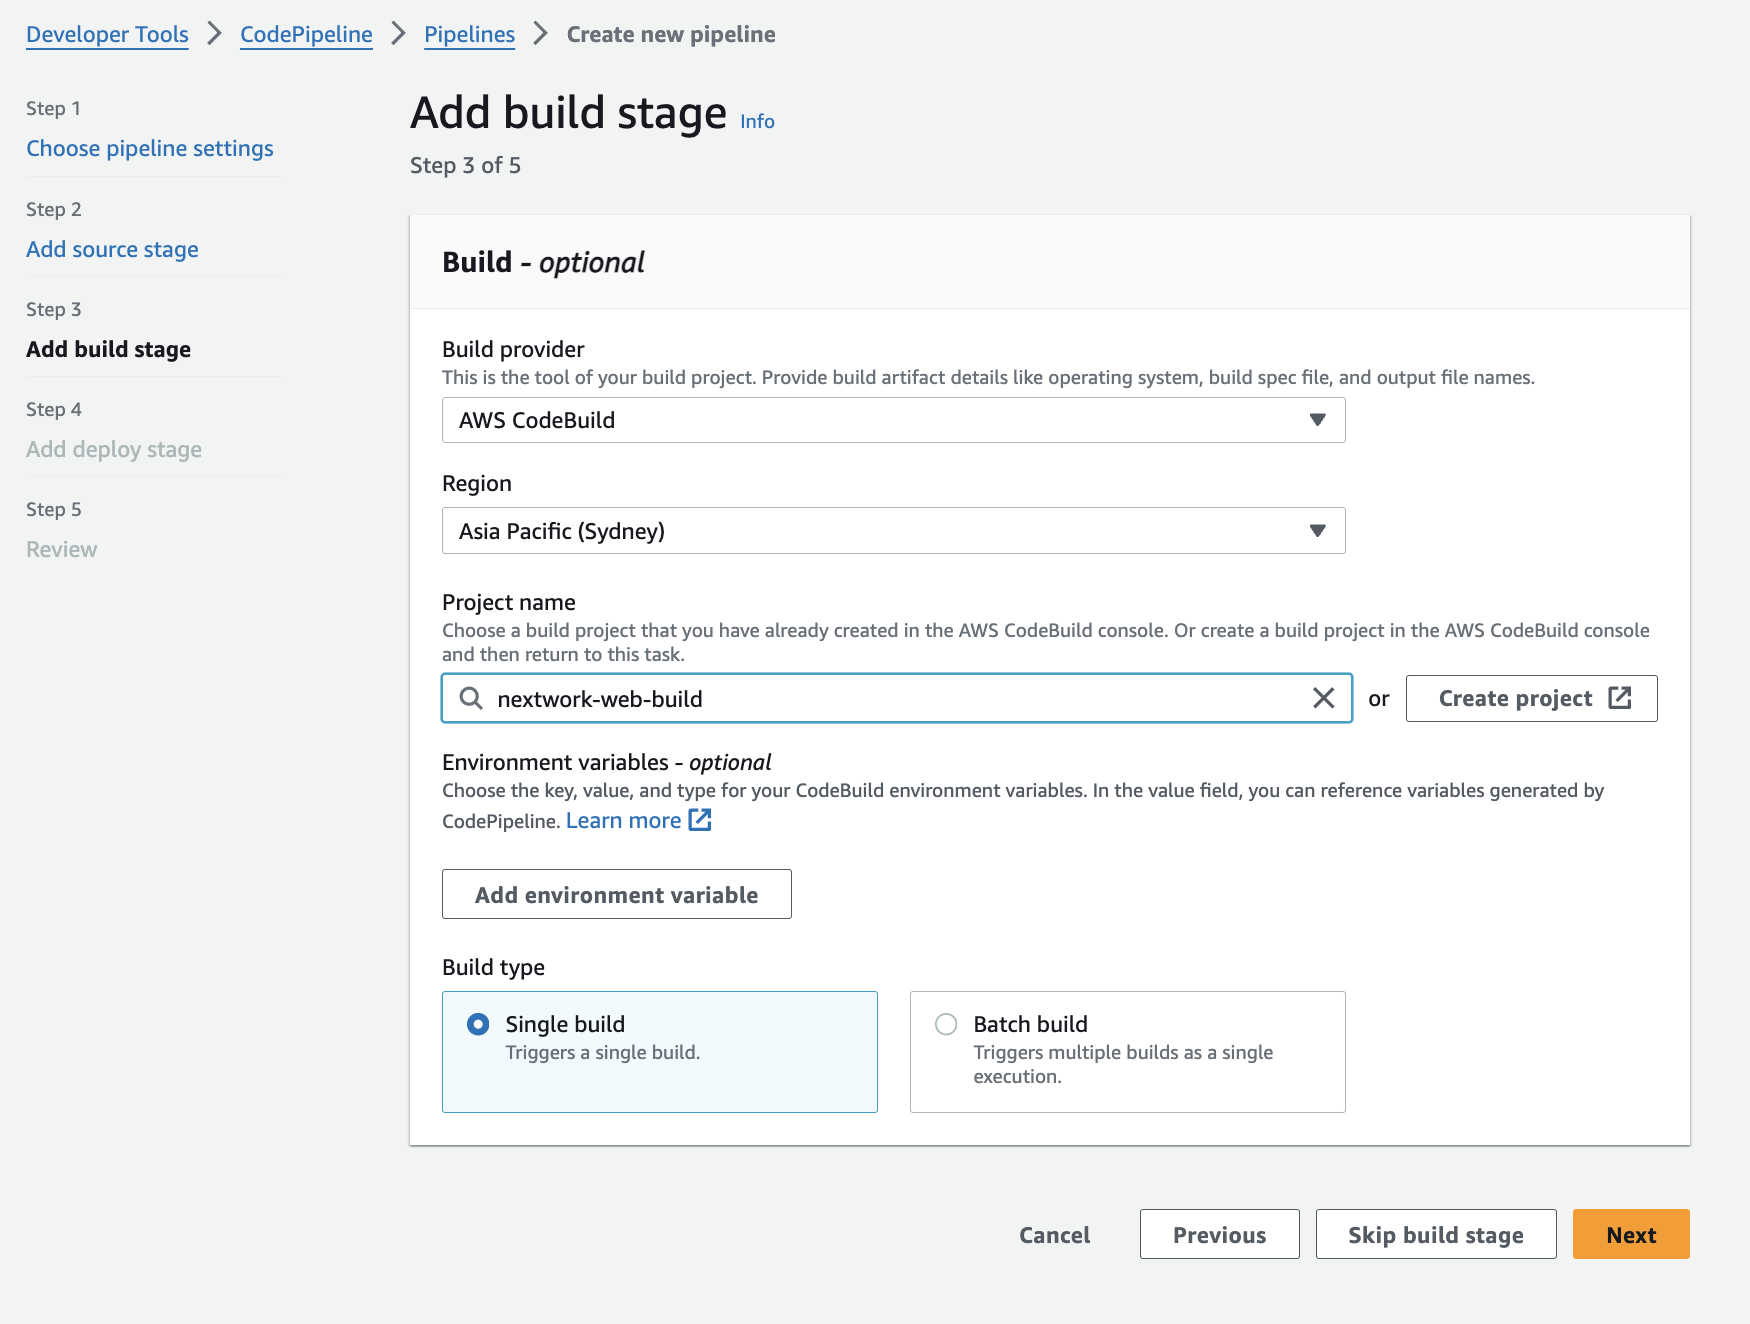
1. Set up a new pipeline in CodePipeline and configured the source, build and deploy stages in your pipeline.
2. Execute a pipeline
I learned what it means when the pipeline is running, watching your code being automatically tested, built, and deployed step by step.
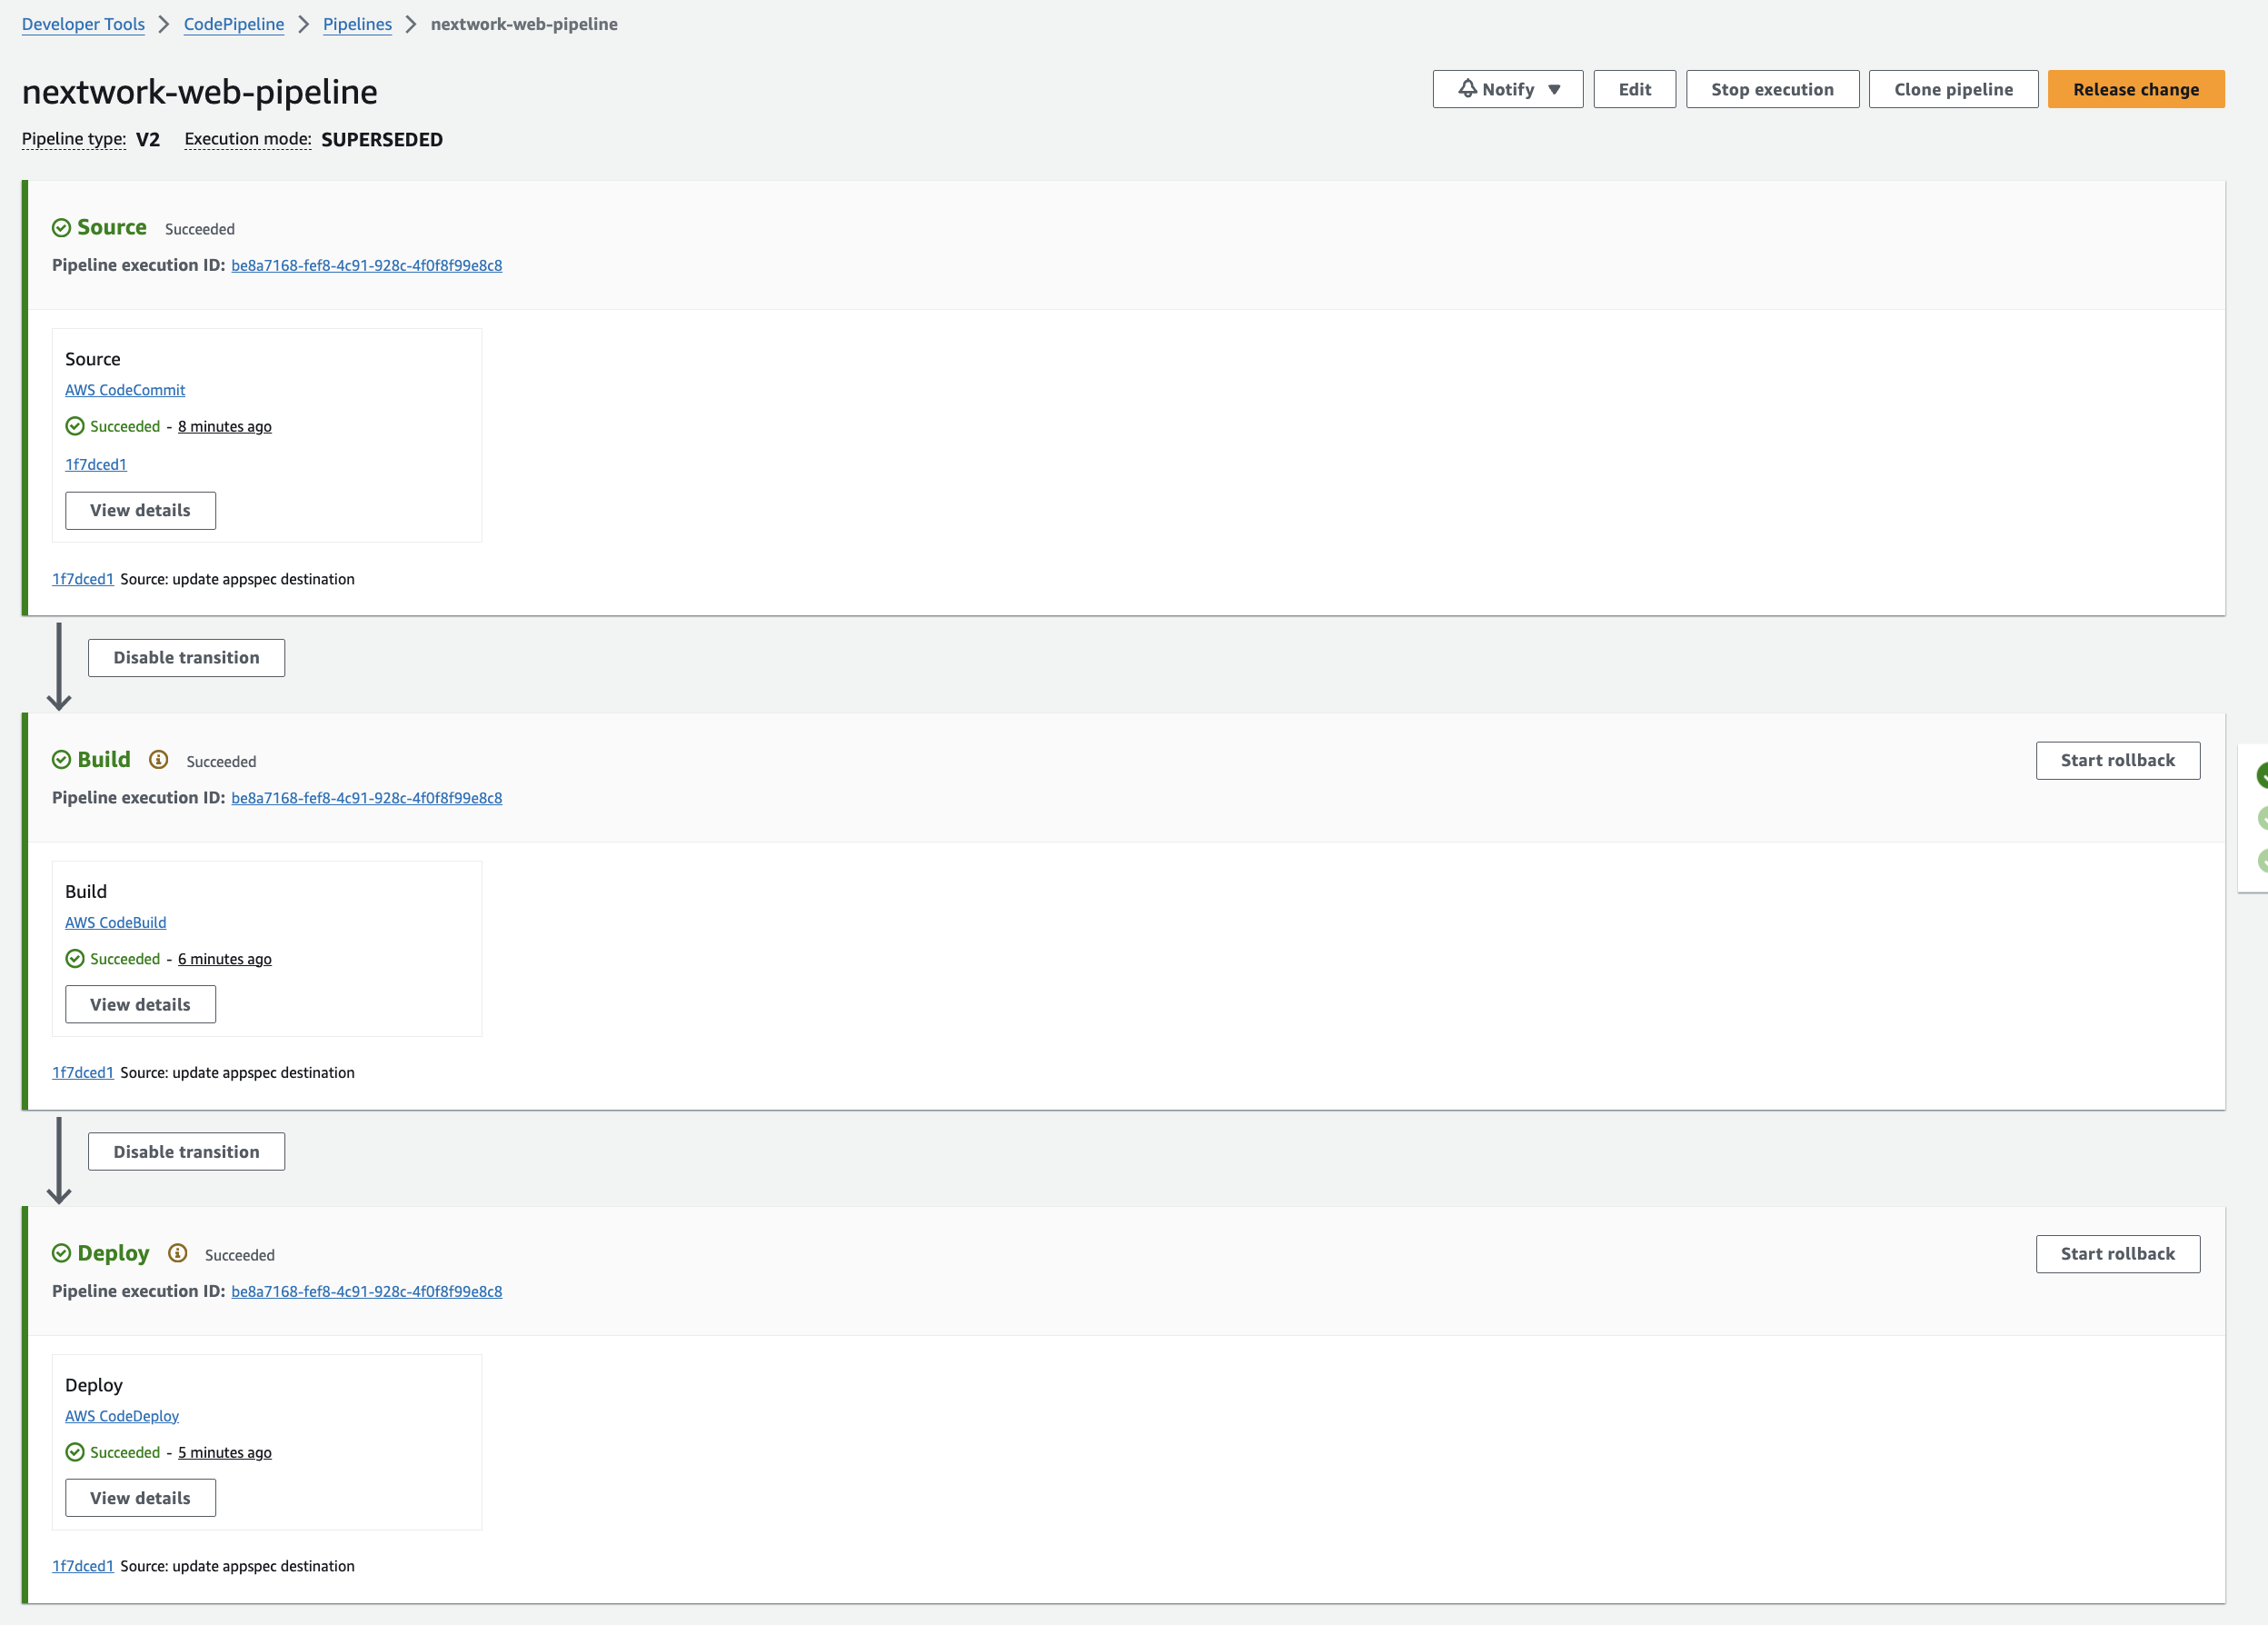
3. Release a change
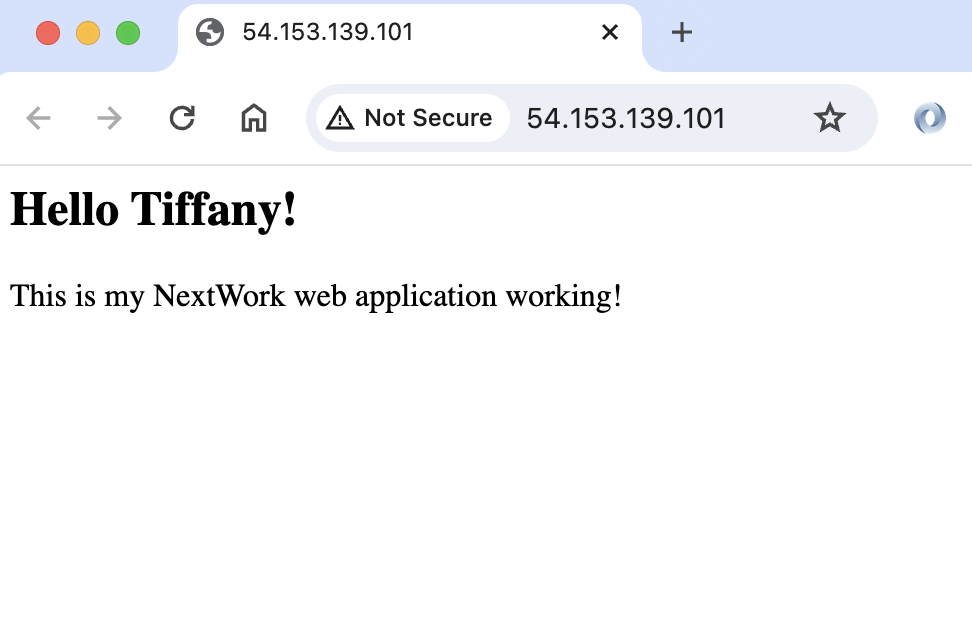
I added the landing page html file to my local file and commit and pushed the changes to the CodeCommit repository. The pipeline executes automatically where my latest version of your code is tested, built, and deployed without manual intervention.
The web page is live 🎉
4. Trigger a rollback

Key notes ✏️:
What's rollback?
A rollback lets you go back to a previous version of your application that worked well—this can be a lifesaver if new changes cause problems! In this instance, you only rolled back the deployment stage. This means your source code and build won't be touched, but the version of the application on the server is back to how it was before your latest update.
Simply select the "Release change" button again to bring back the latest version.

Woohoo!! Now I have a fully managed CI/CD pipeline working!